This flying keys project was a lot of fun to put together, and it was super quick! Took me all of 45 minutes. These added a touch more whimsy to our daughters’ Harry Potter Themed birthday.
DISCLAIMER: I am not an artist of any type. I just play one in my mothering life. 😛
How to make Flying Keys:
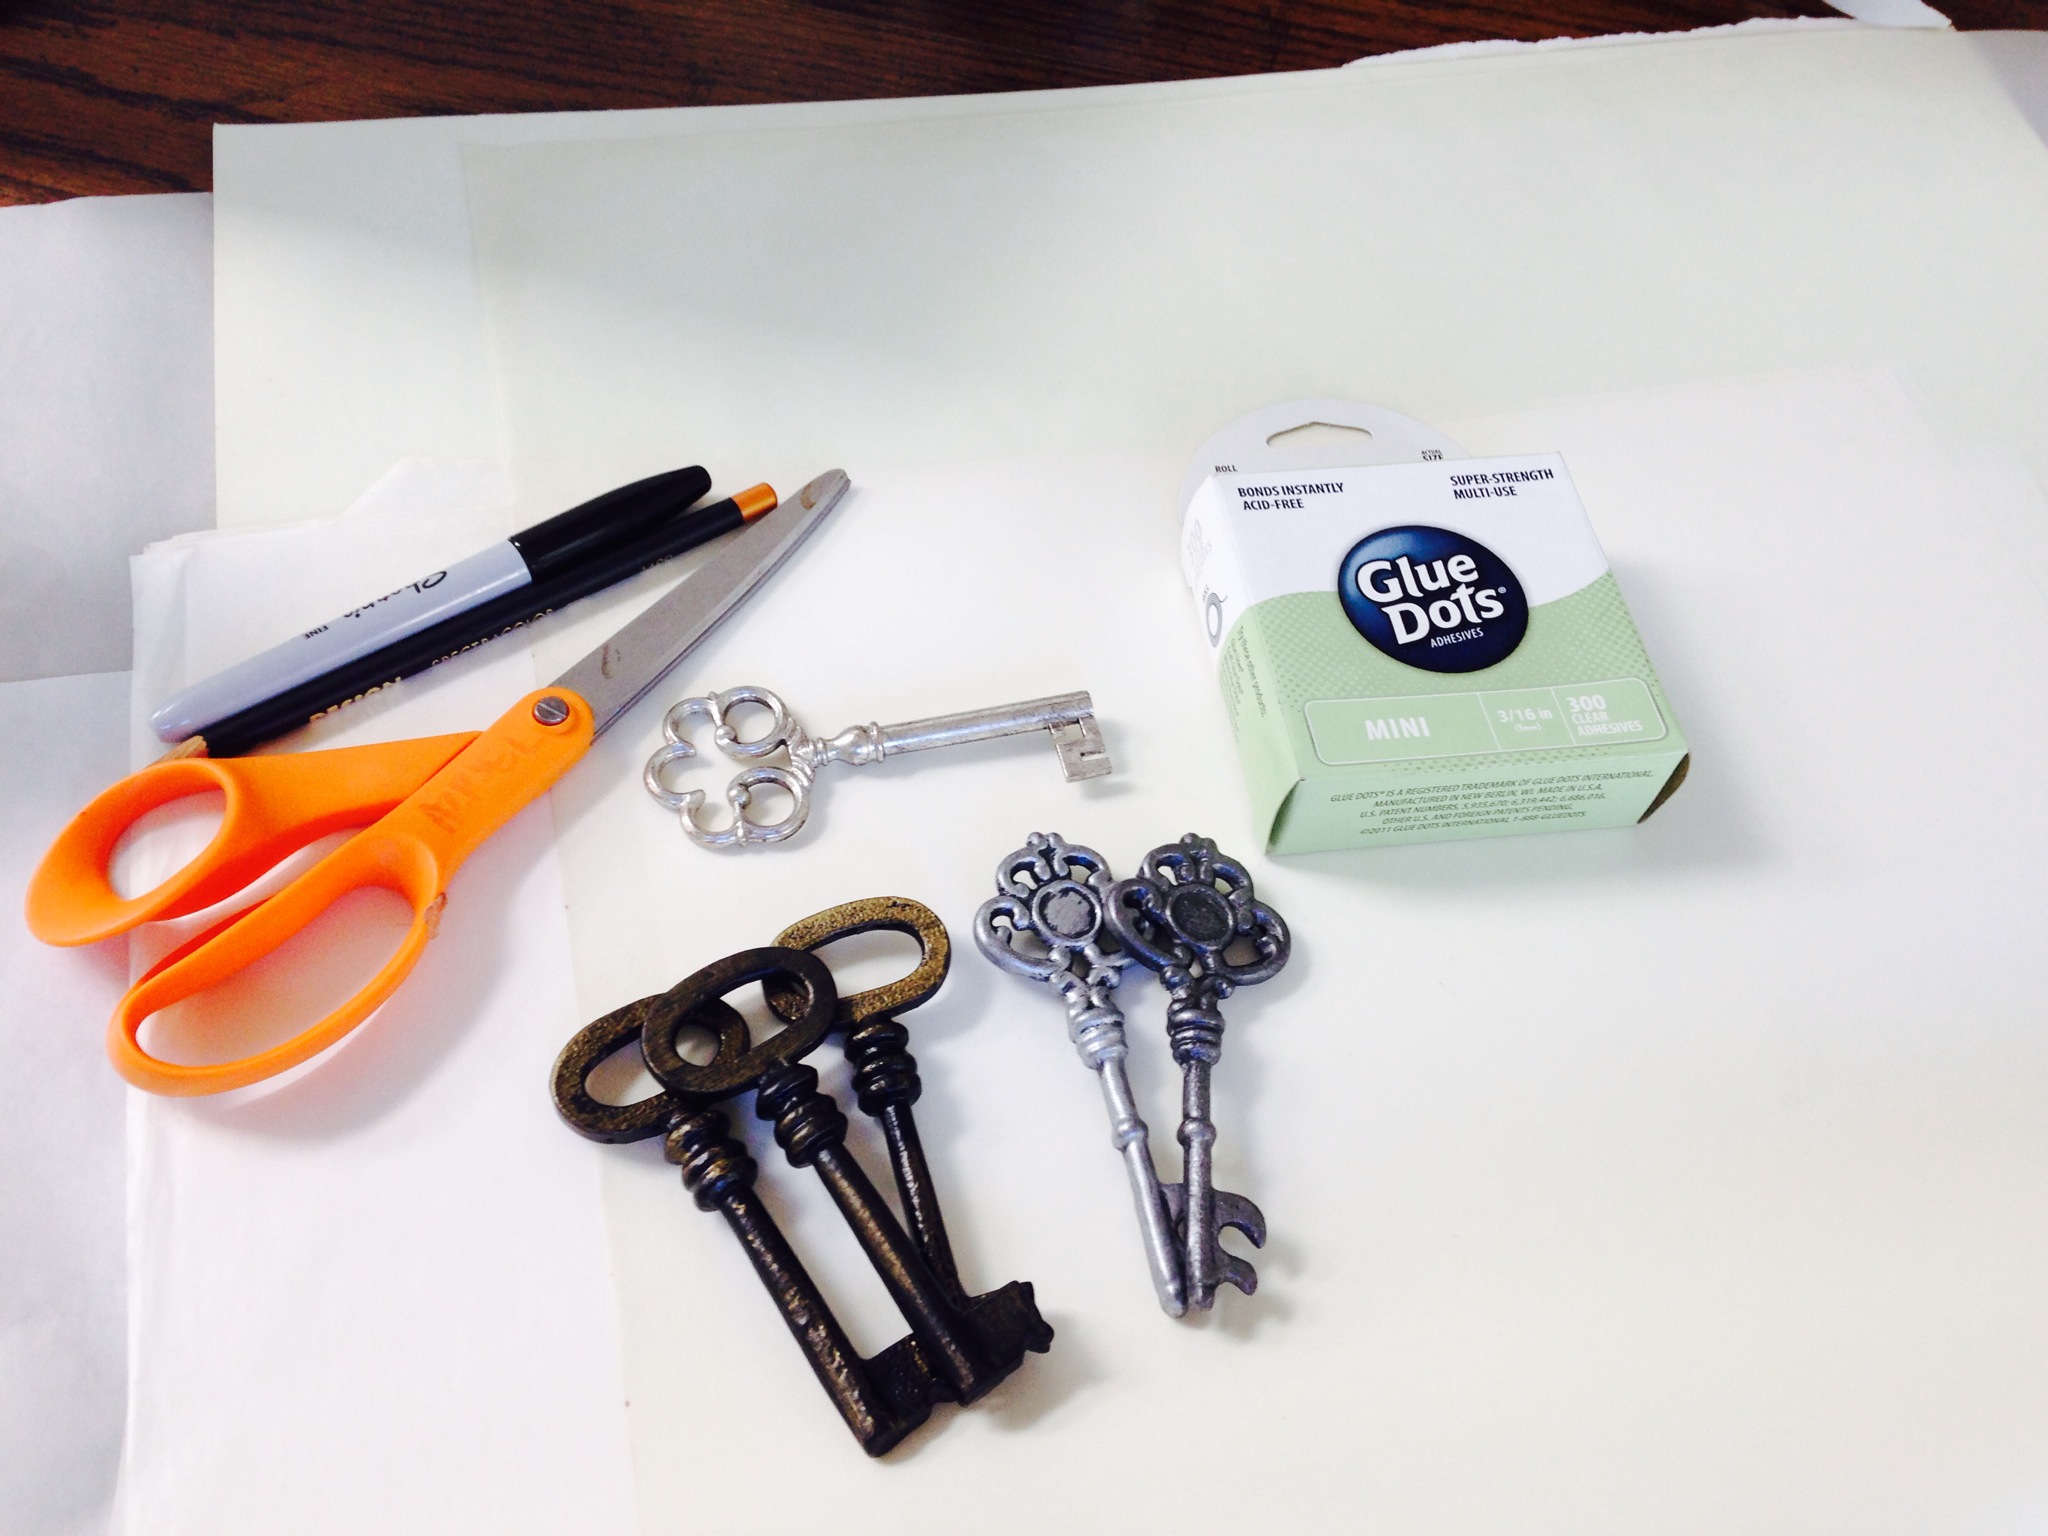
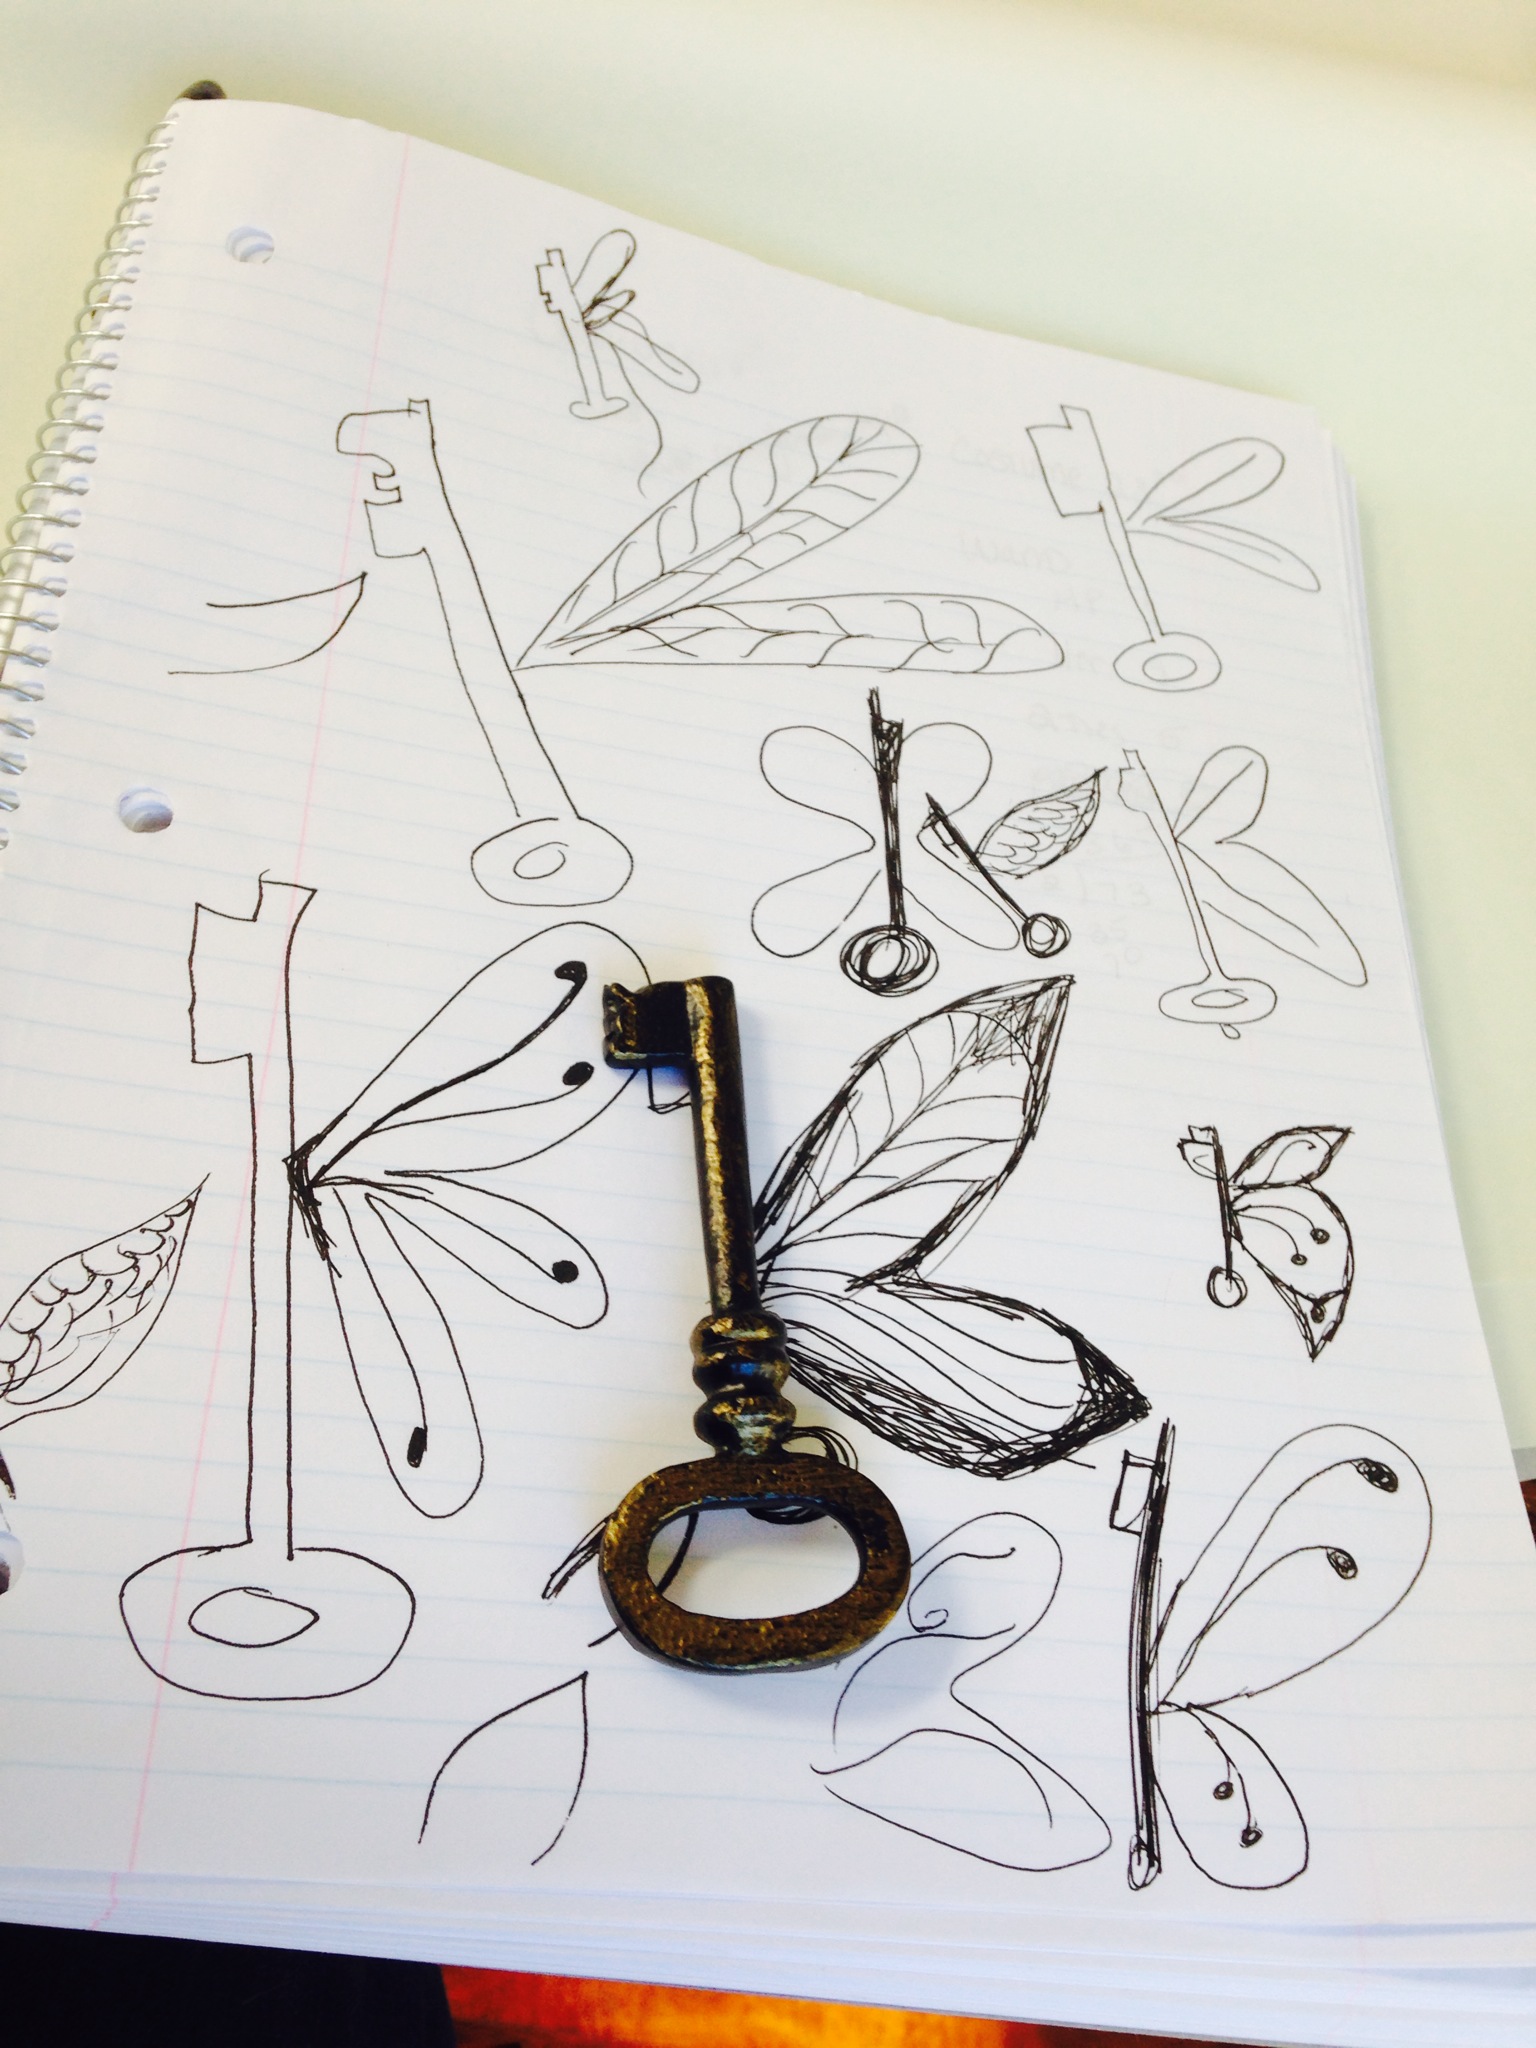
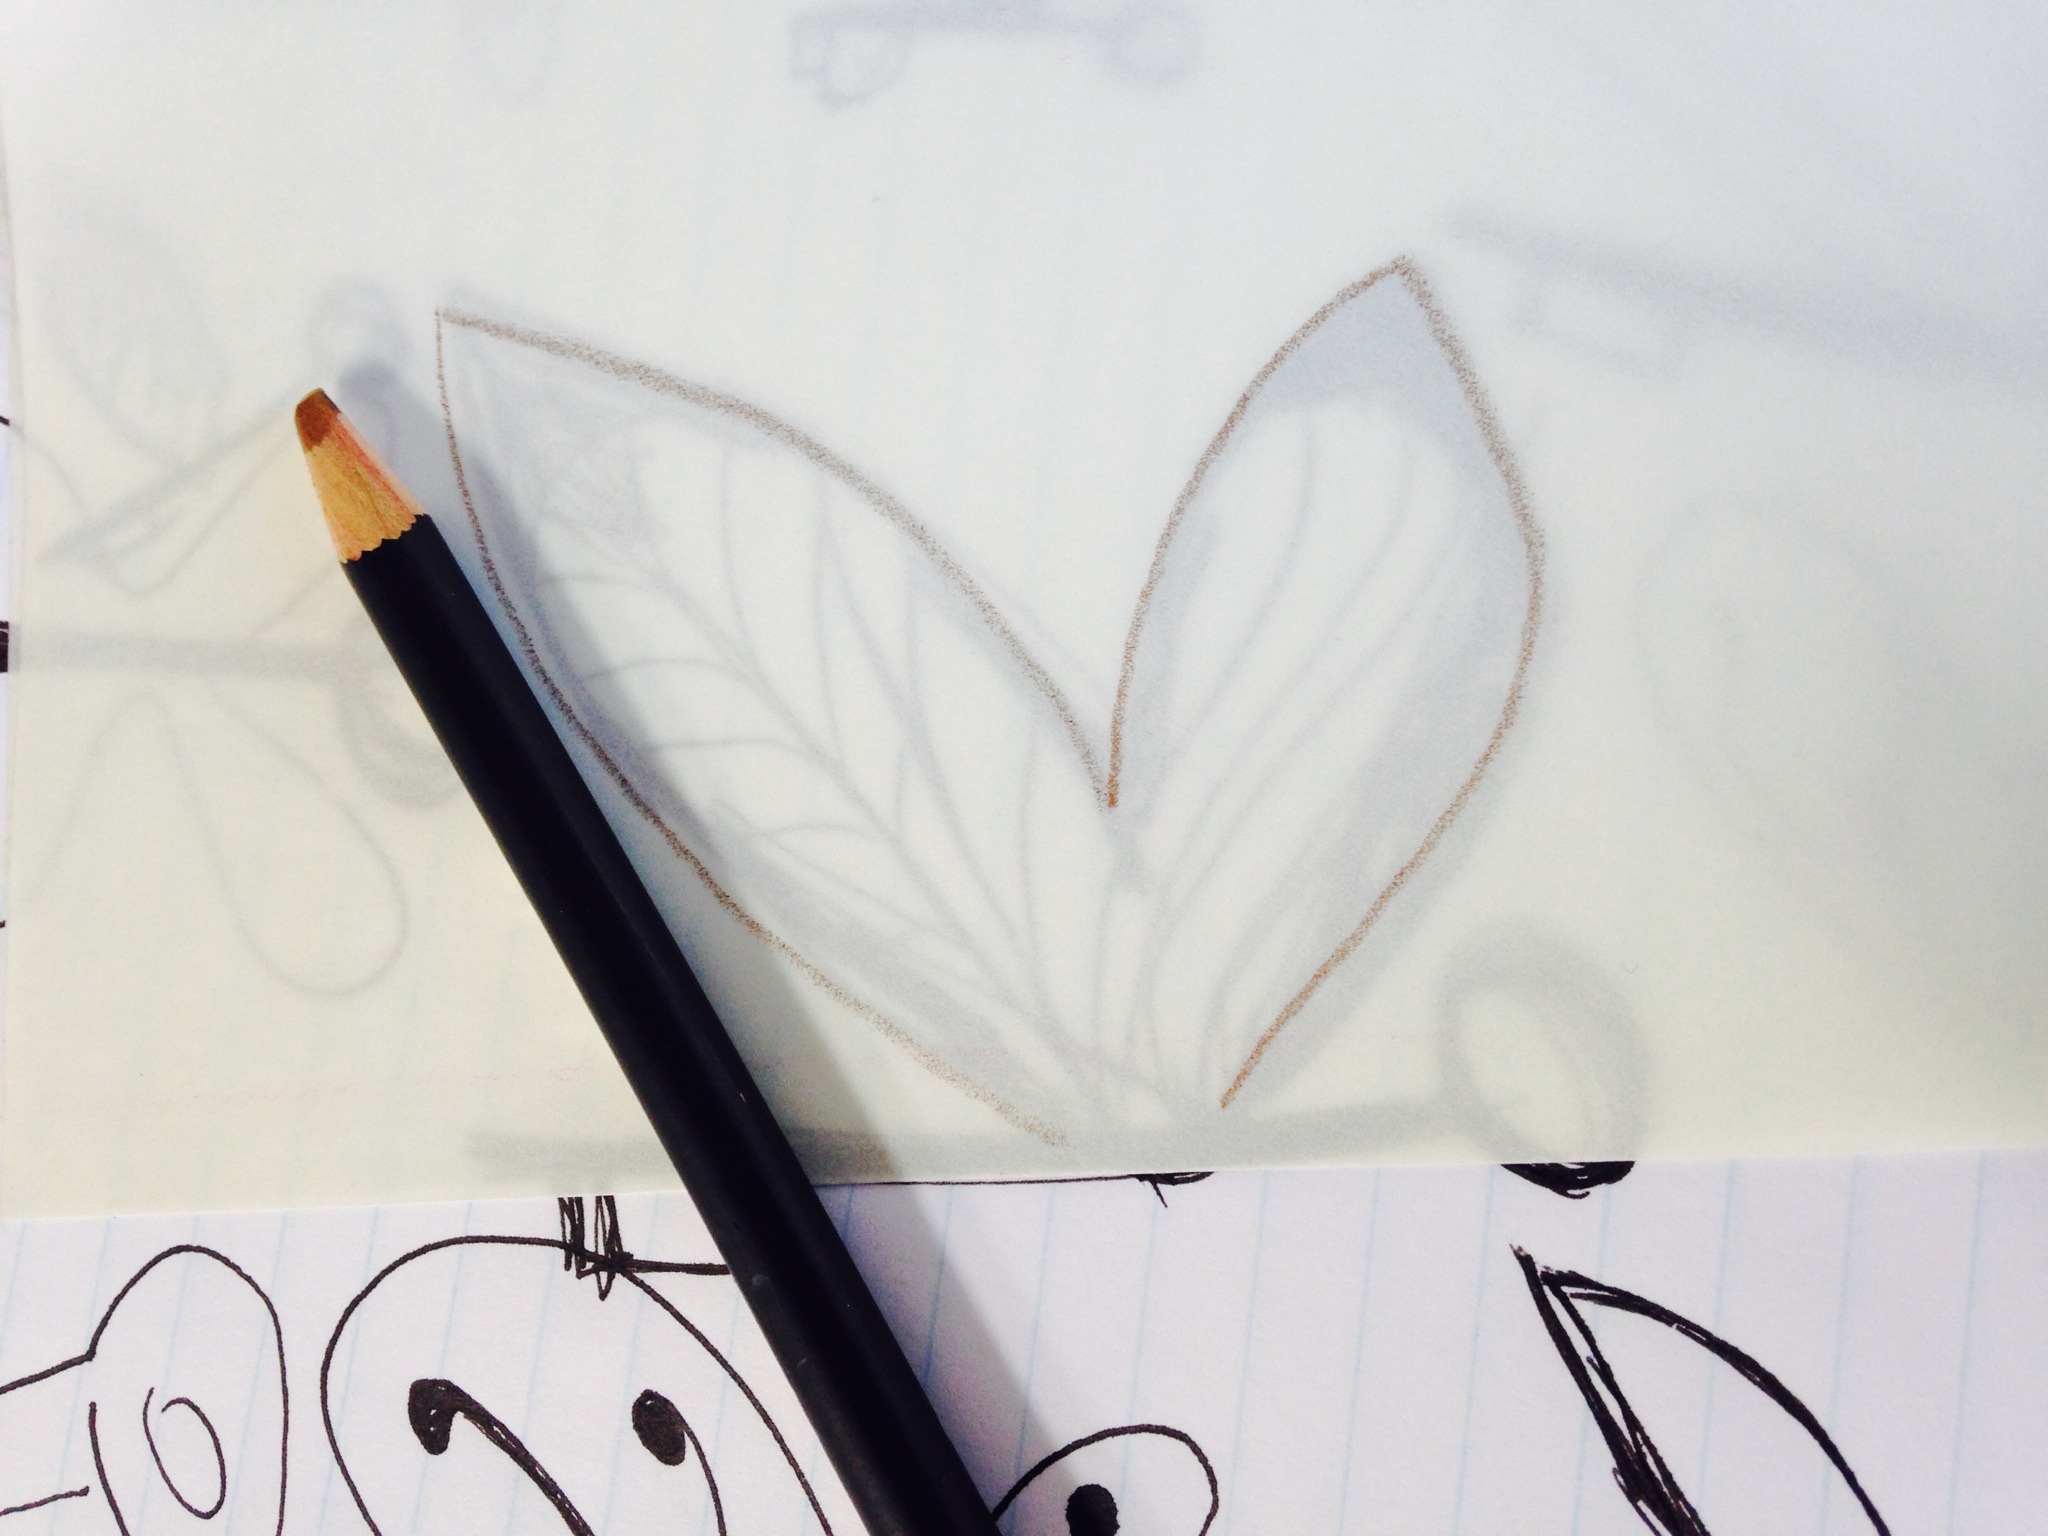
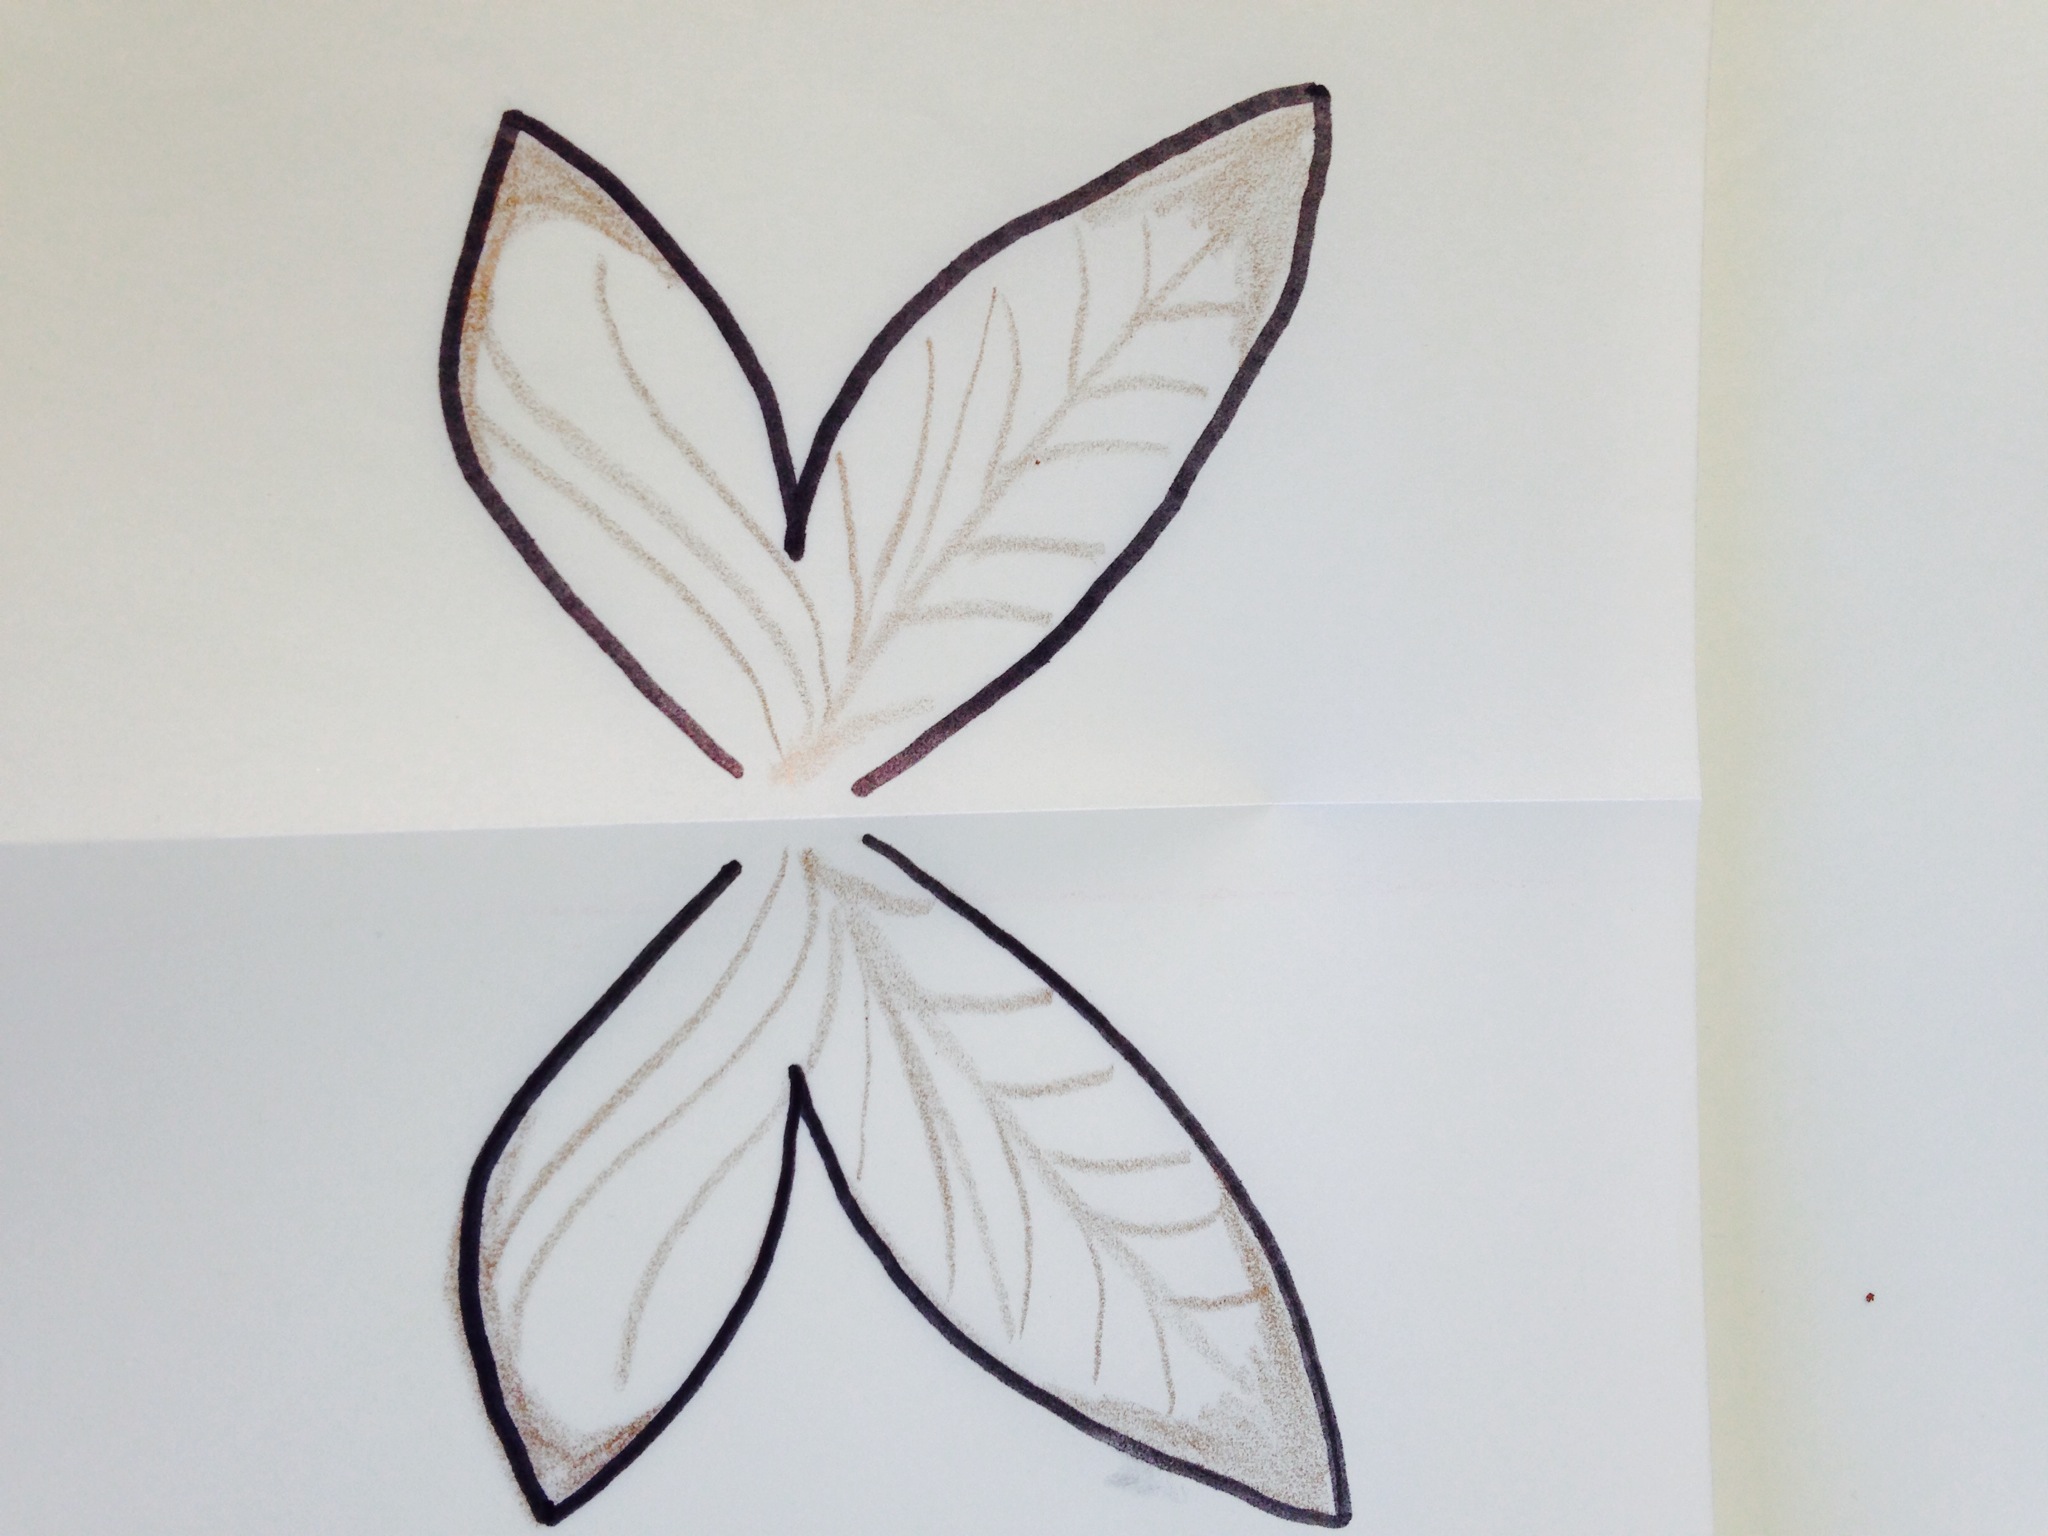
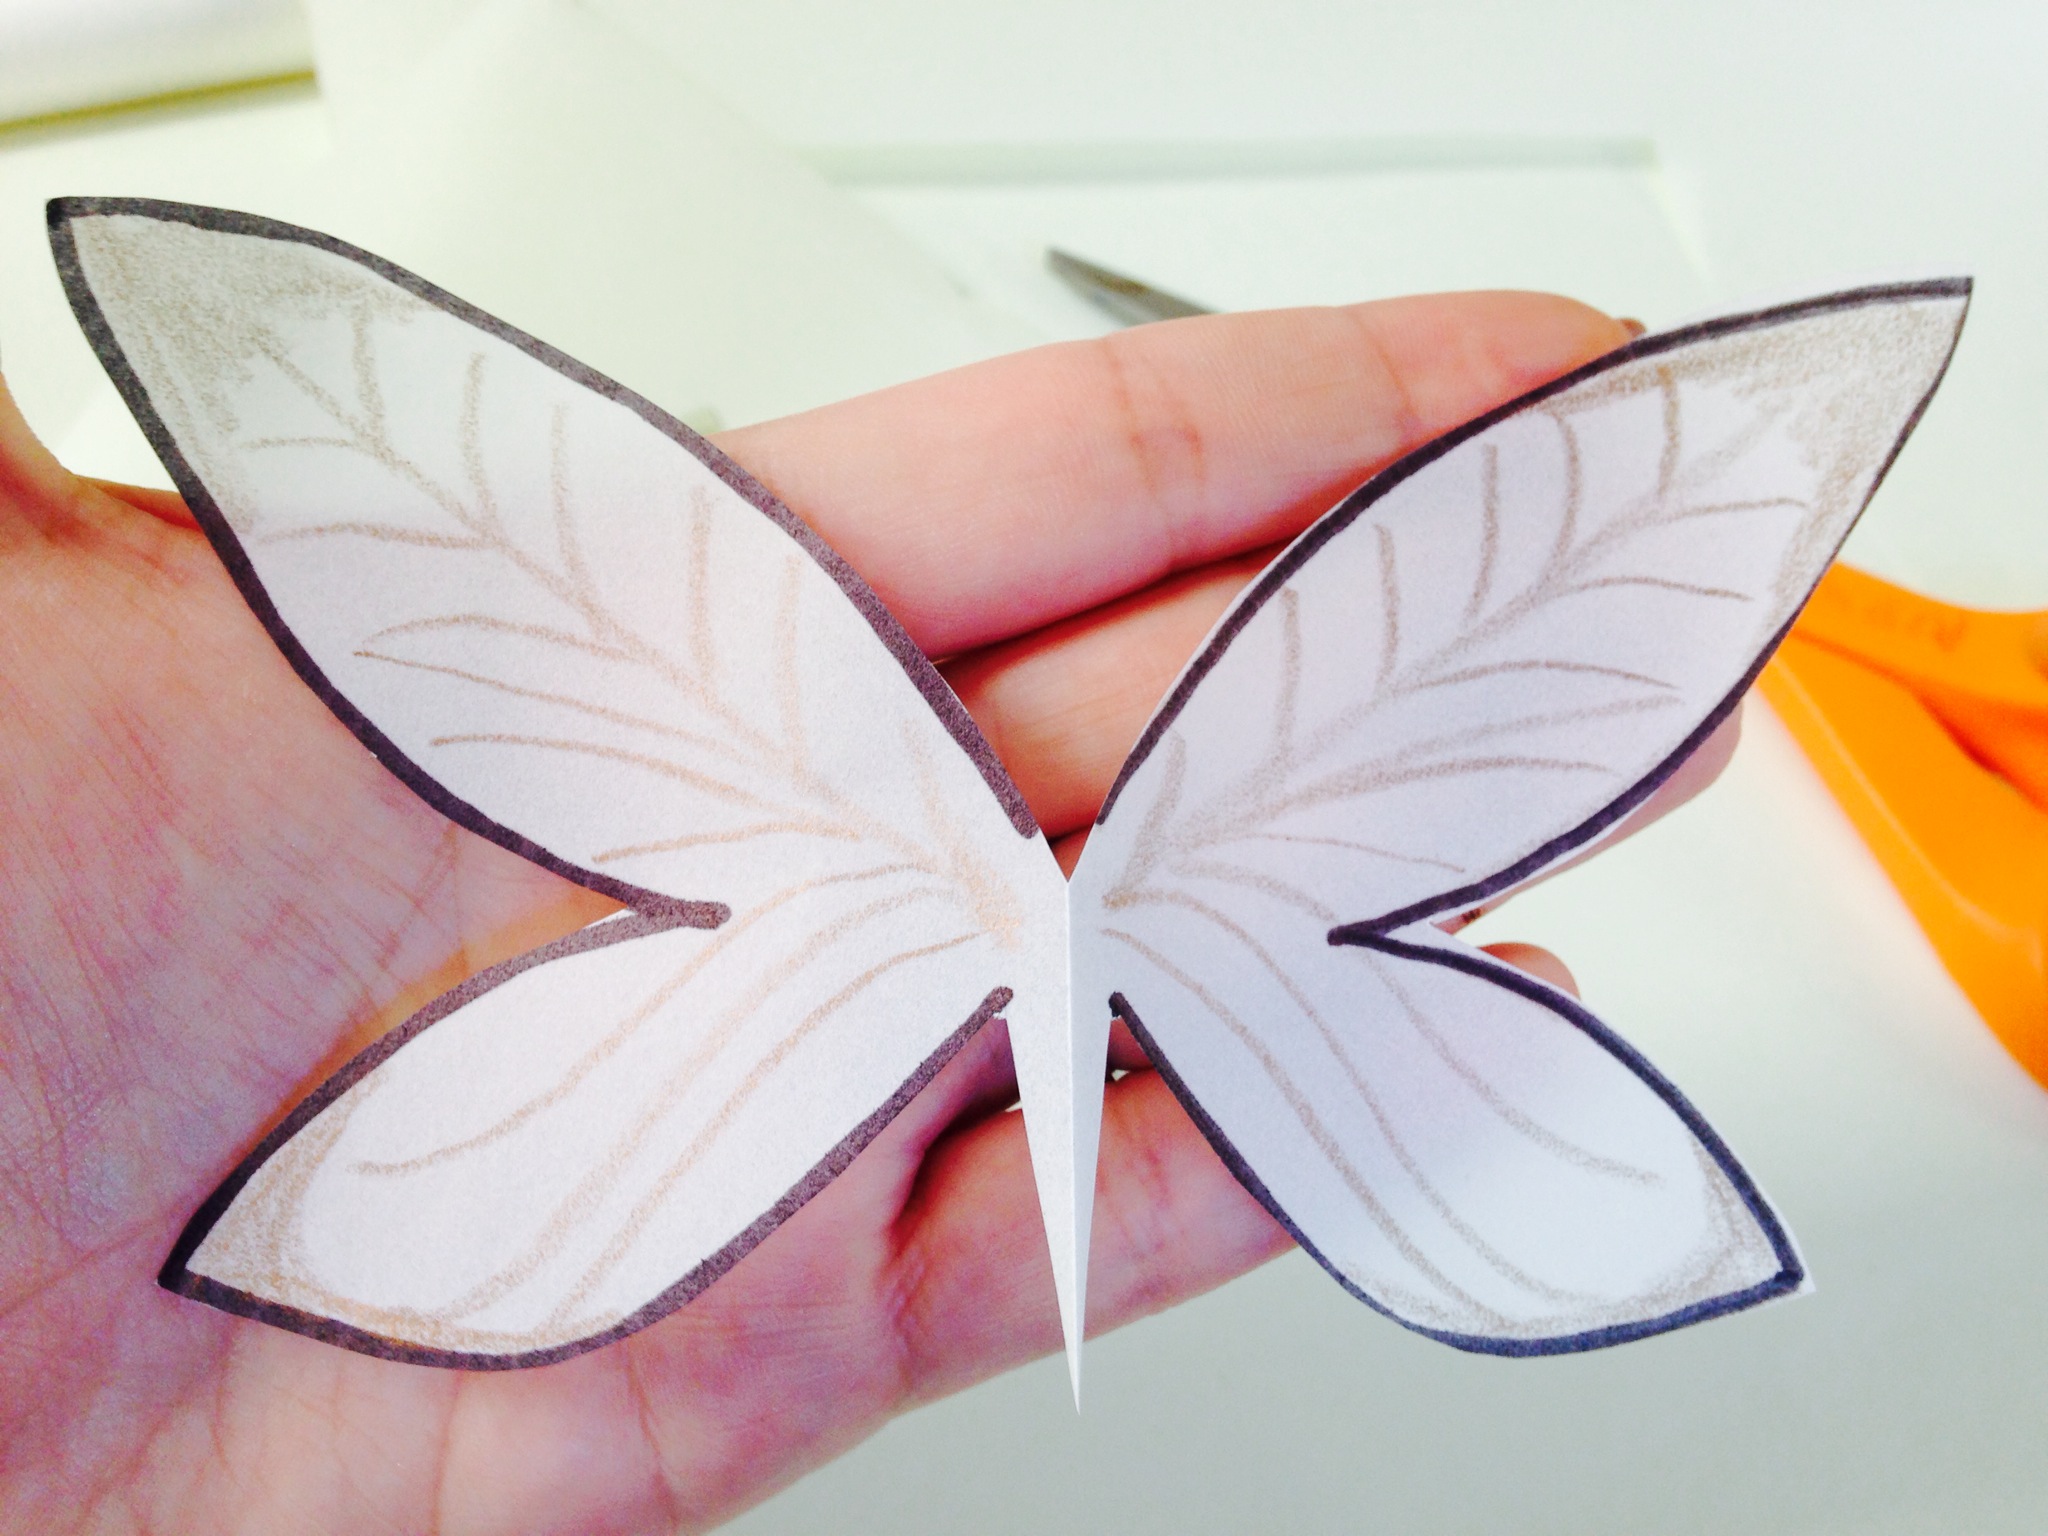
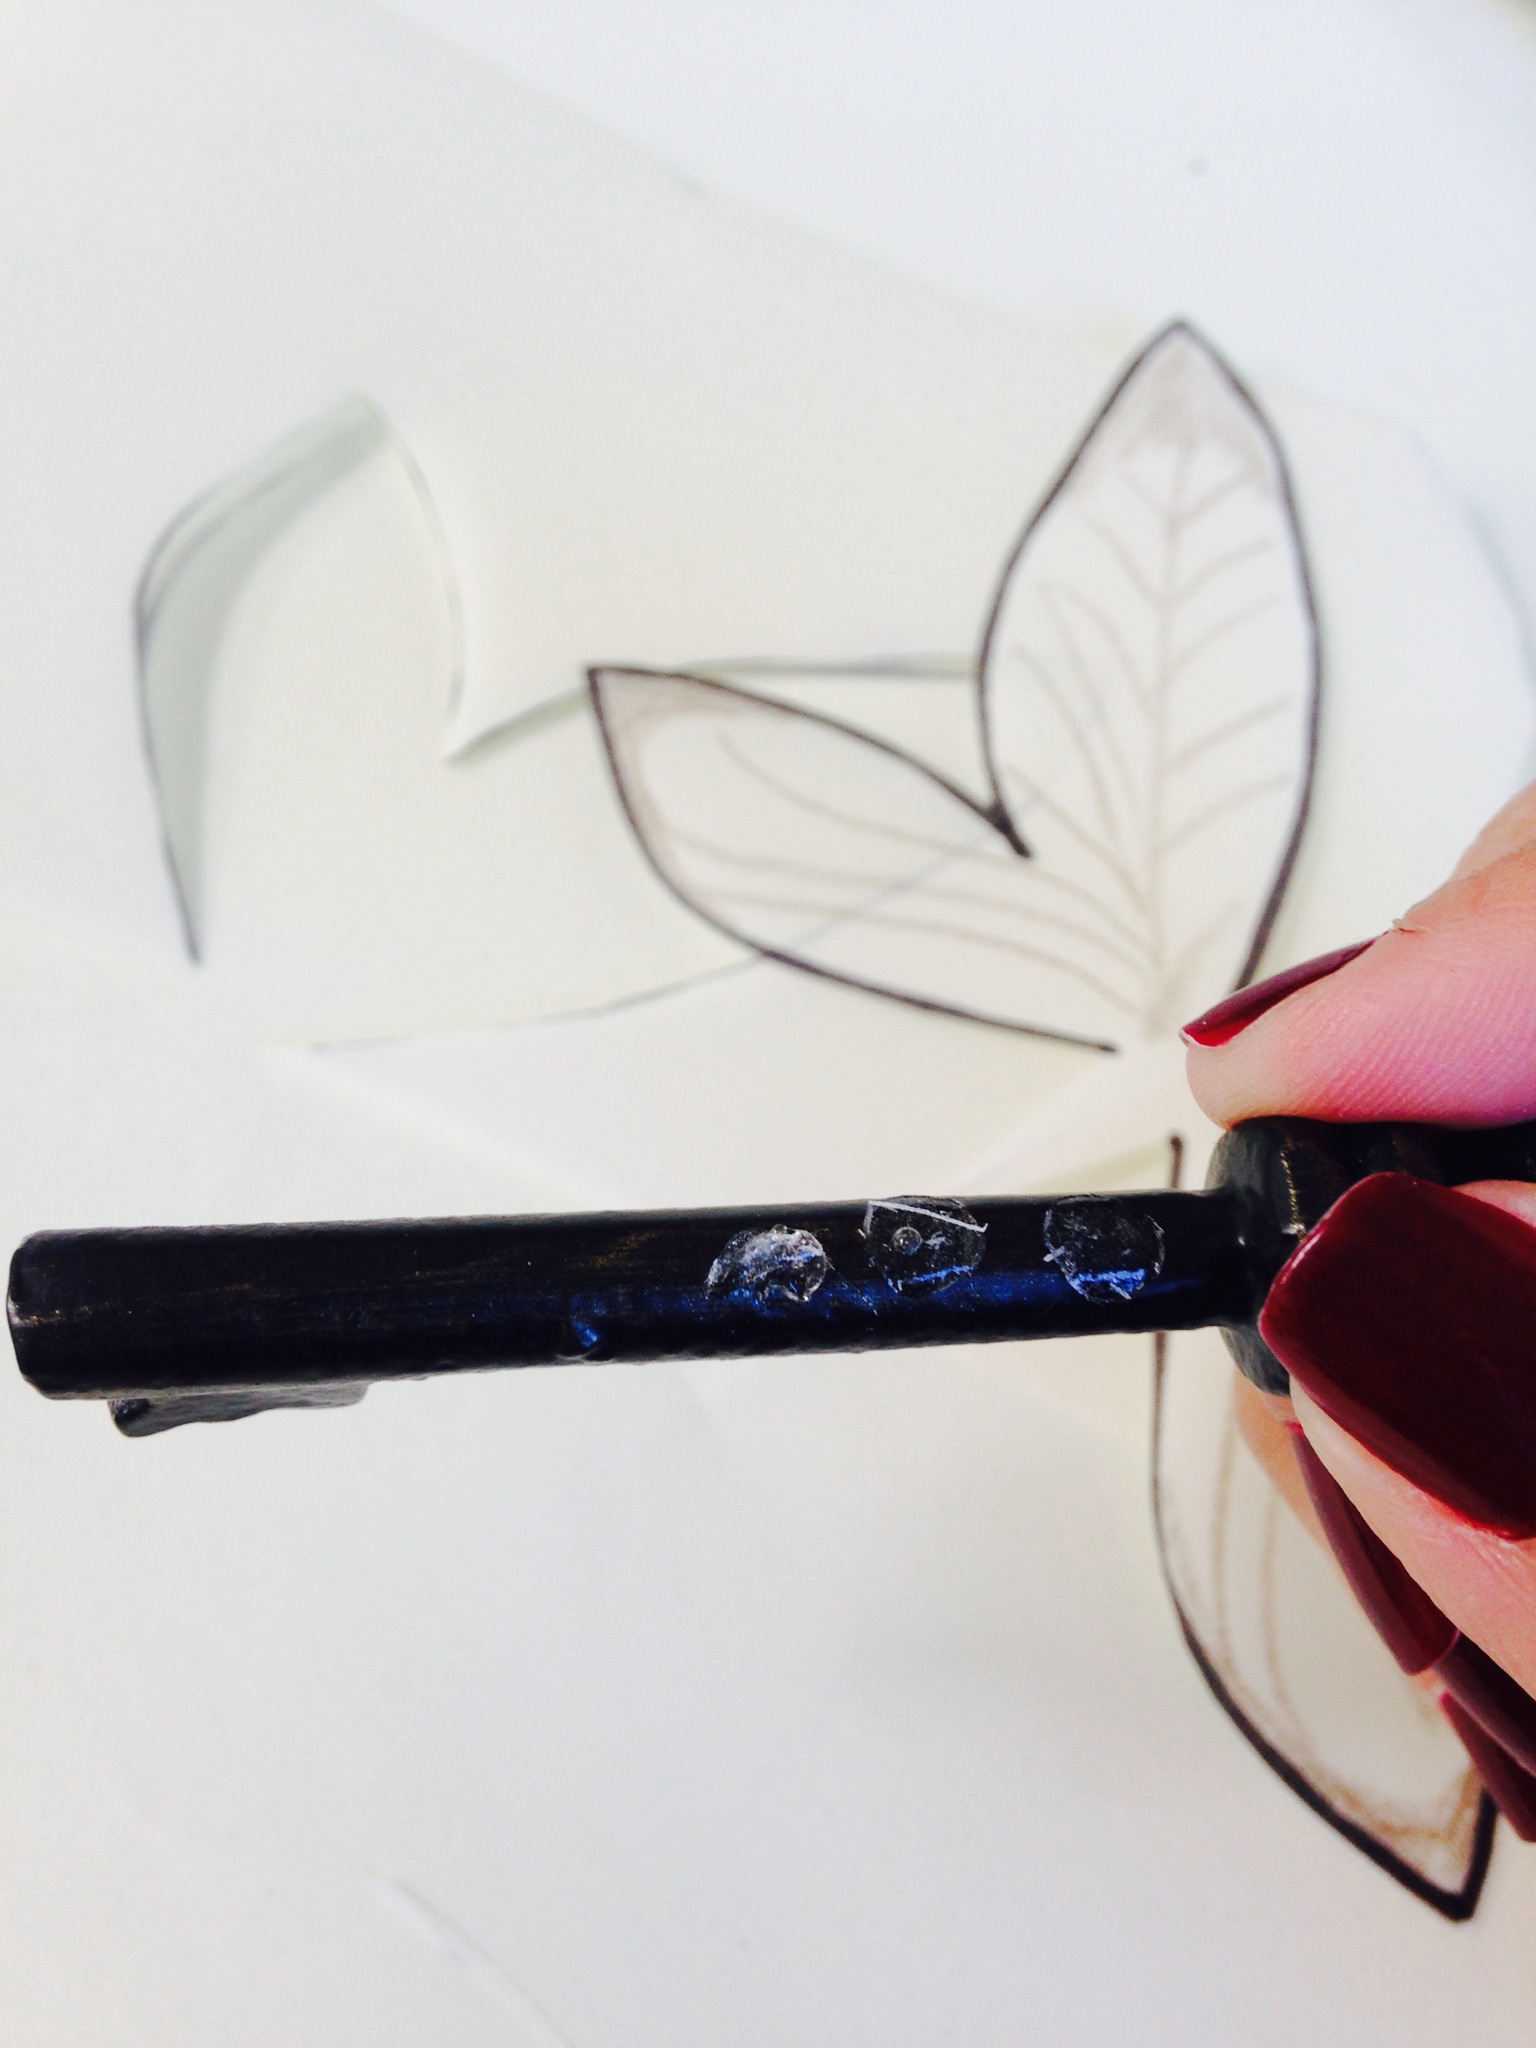
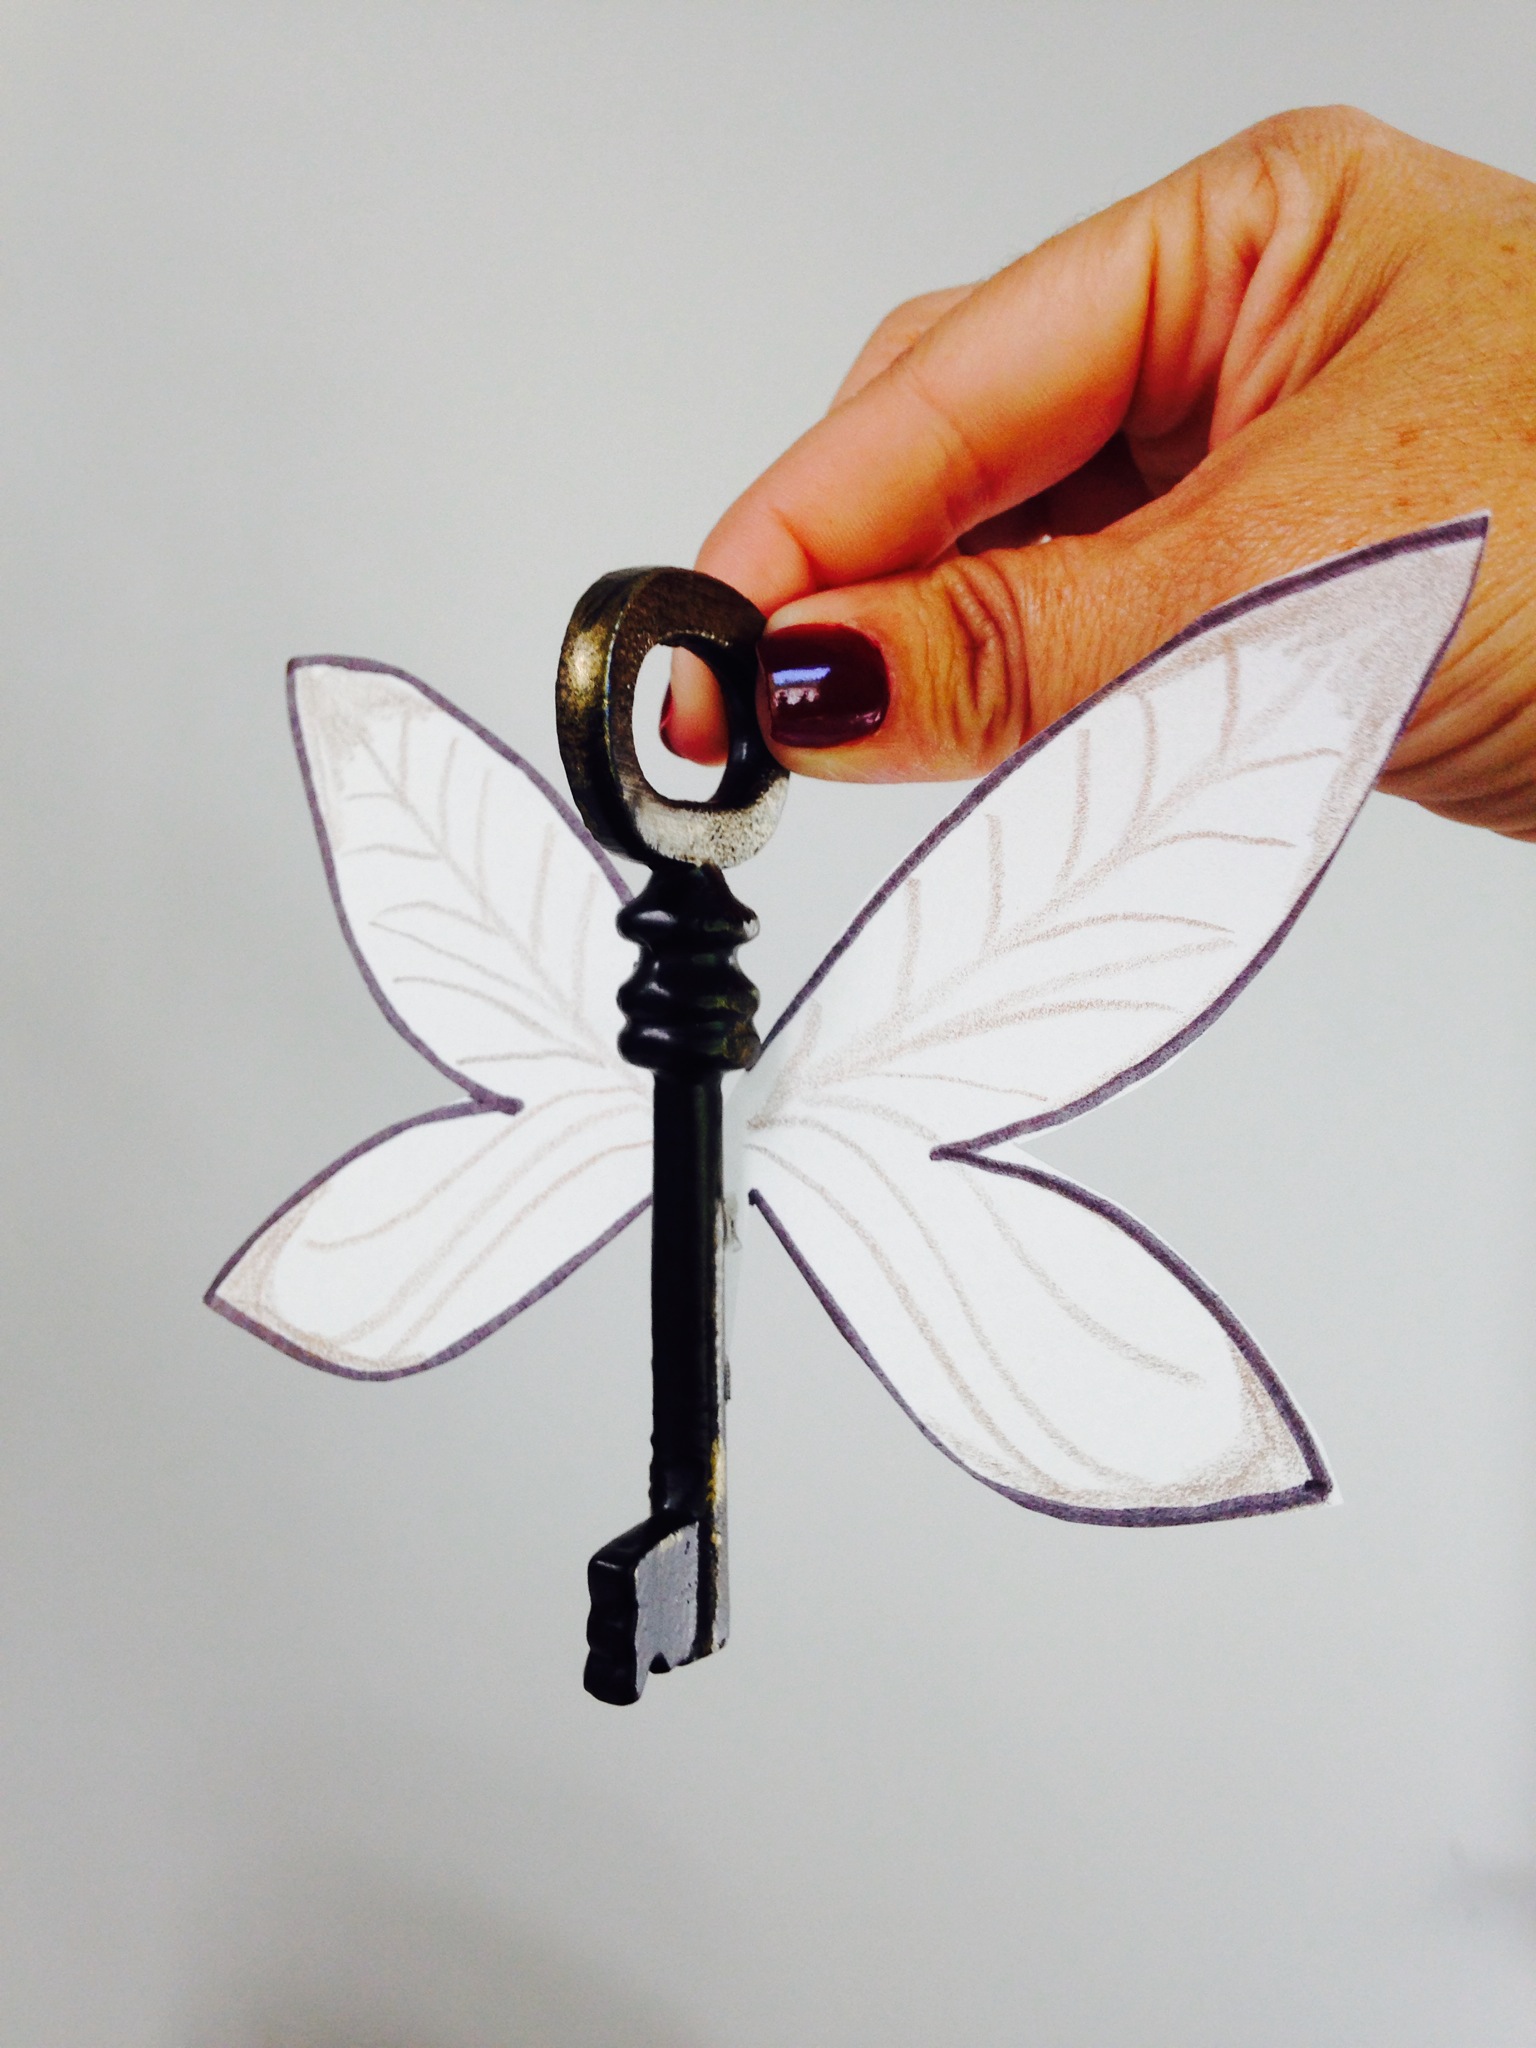
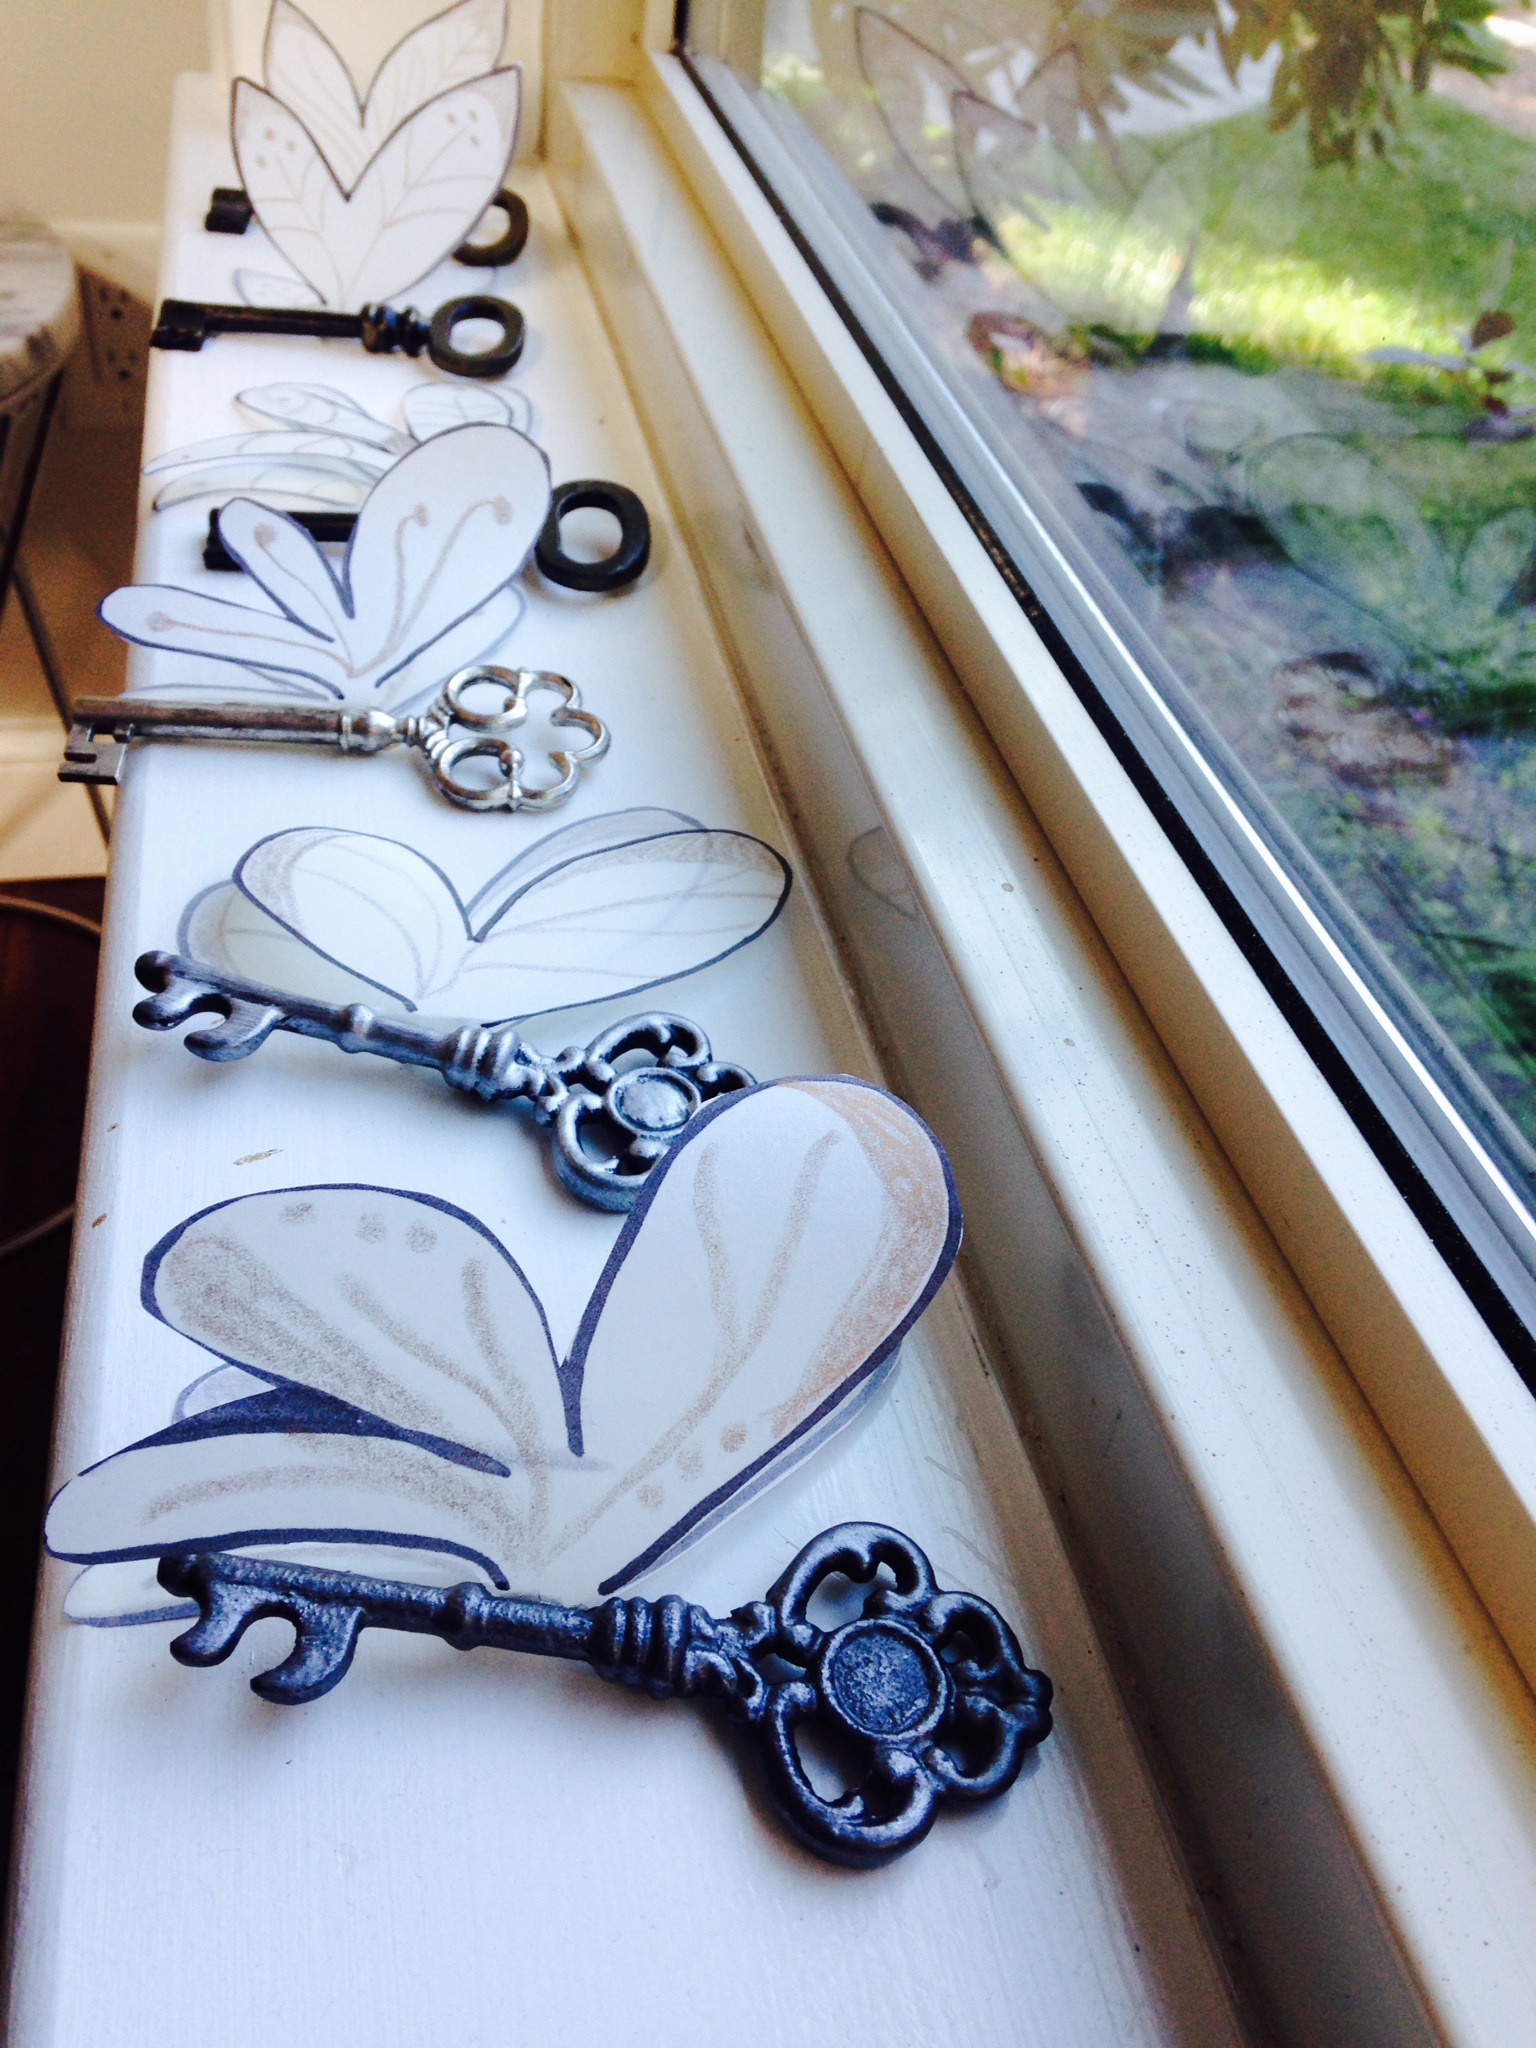
Supplies- Skeleton type keys, glue (quick drying if you do not have glue dots), scissors, a black sharpie, a bronze pencil and a sheet of vellum. This project was made for 6 keys, and one large sheet of vellum (18×24) was more than plenty.My doodles of wings. This came in super handy as a legend for shapes.Fold vellum. Trace image in pencil, then cover edges with marker.Wings in marker with bronze pencil veining inside. The middle is empty, this is where you will adhere it to the keys, but you need to cut a stem to get it to really hold onto the keys (see below image).Cut out the wings and stemAdd glue to key, near the loop edge. I used glue dots, but any quick dry glue will work.Press firmly to attach wingsMaking different wing shapes made them seem more aged and appropriate for the project. Voila.. Harry Potter inspired Flying Keys!
Remember to make one with a broken wing!
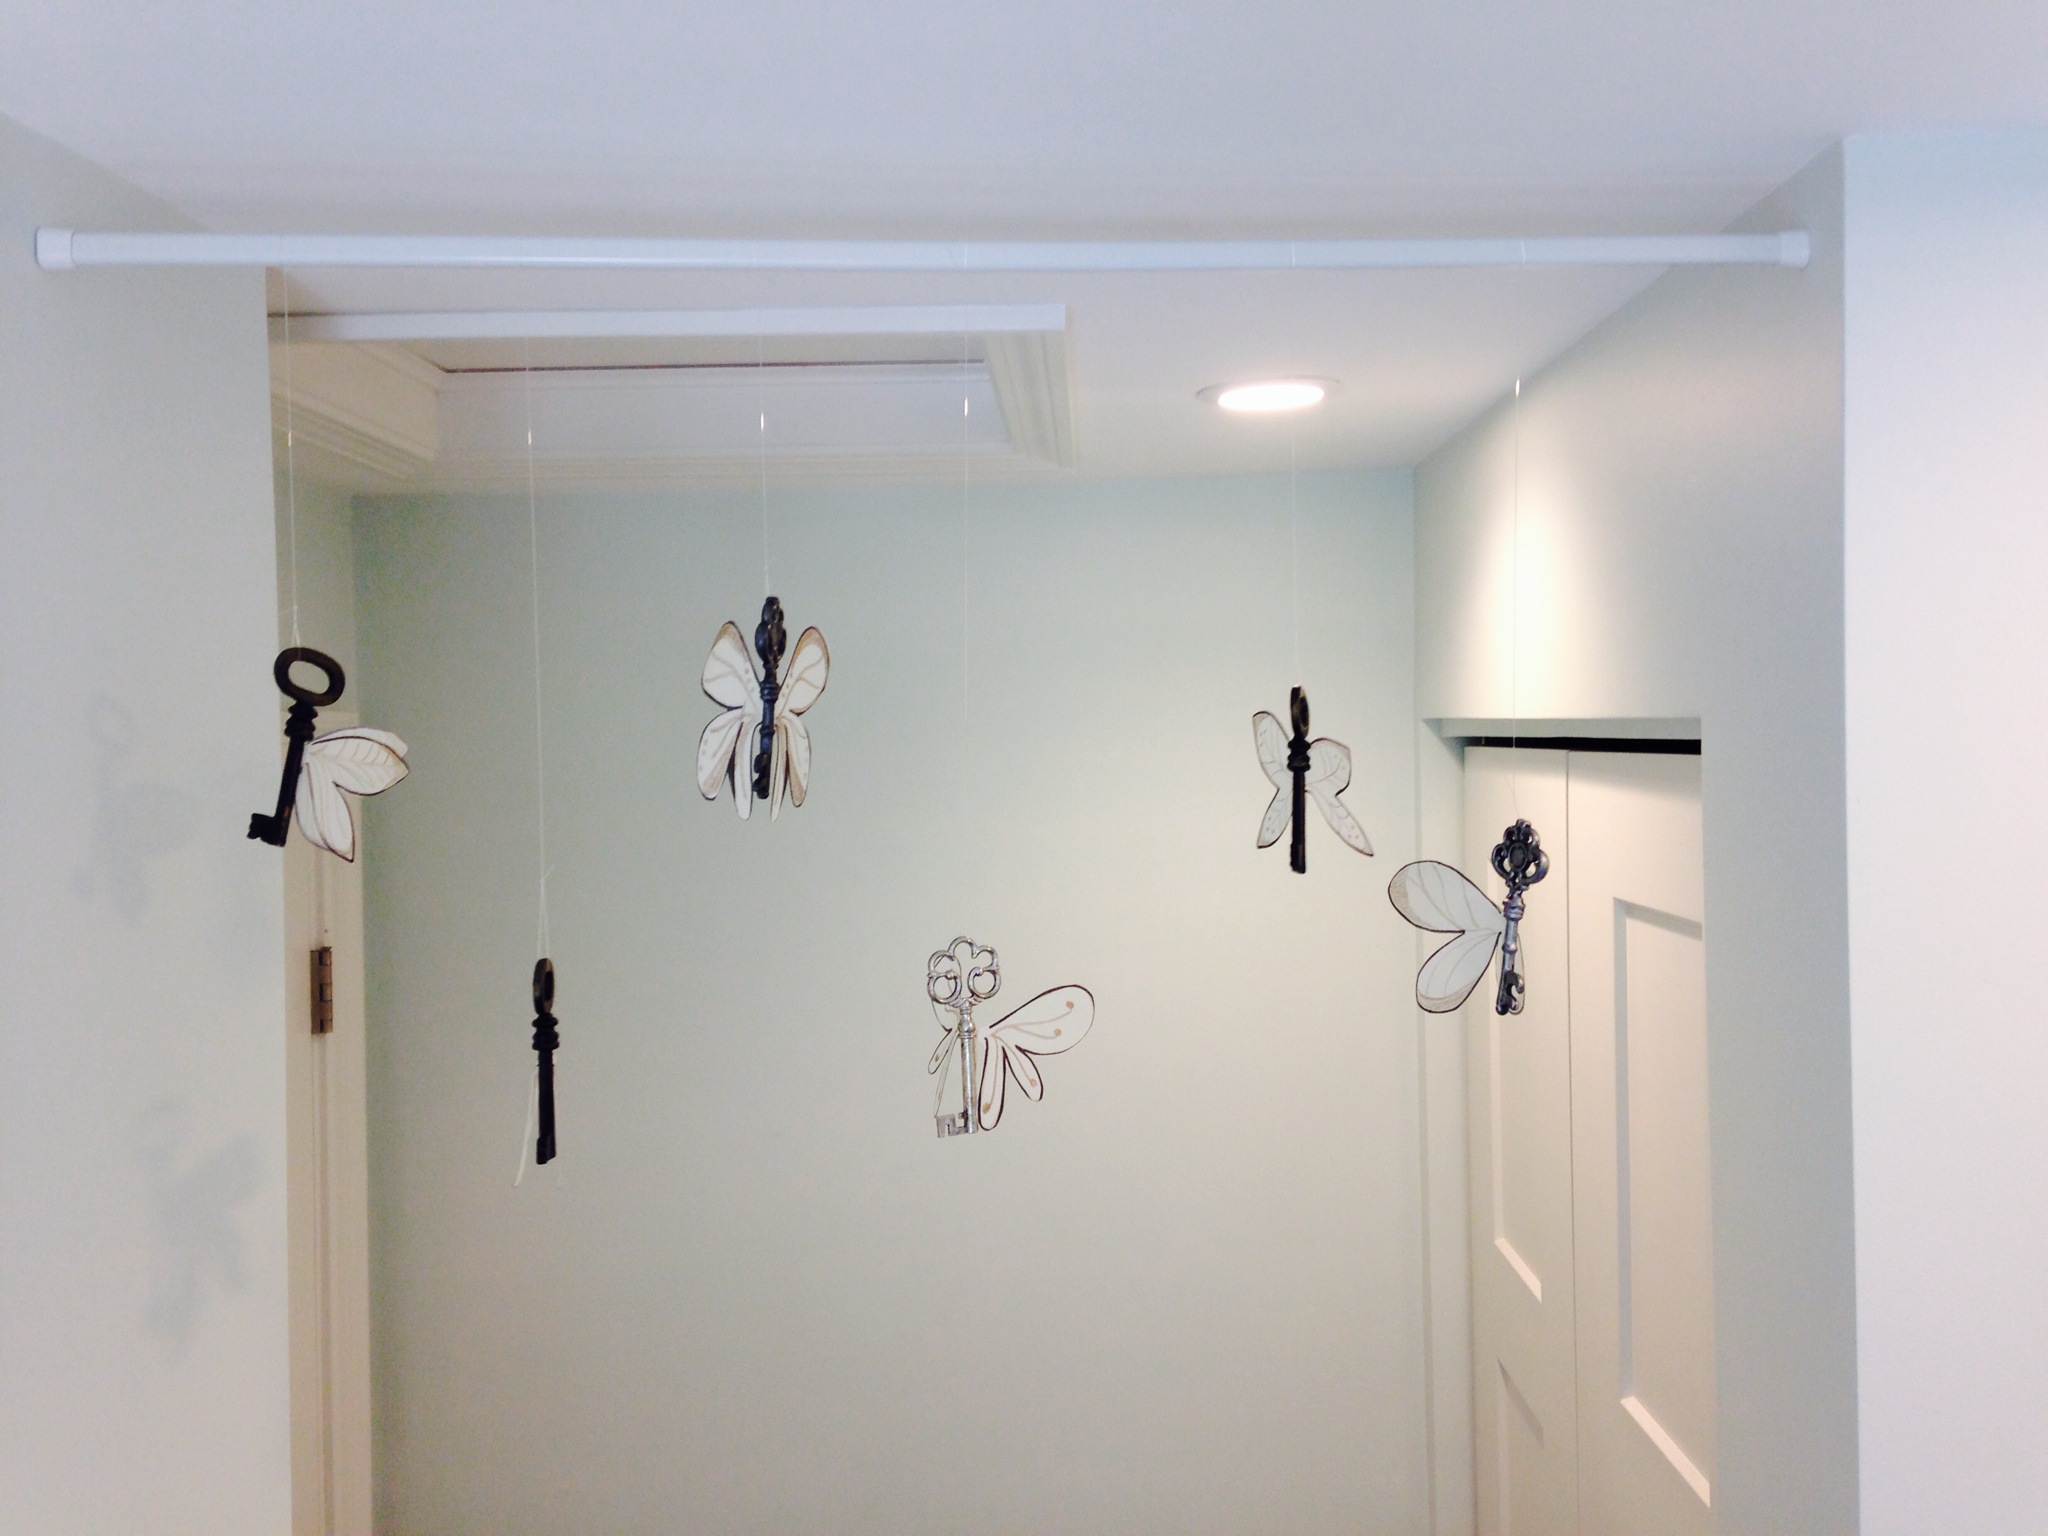
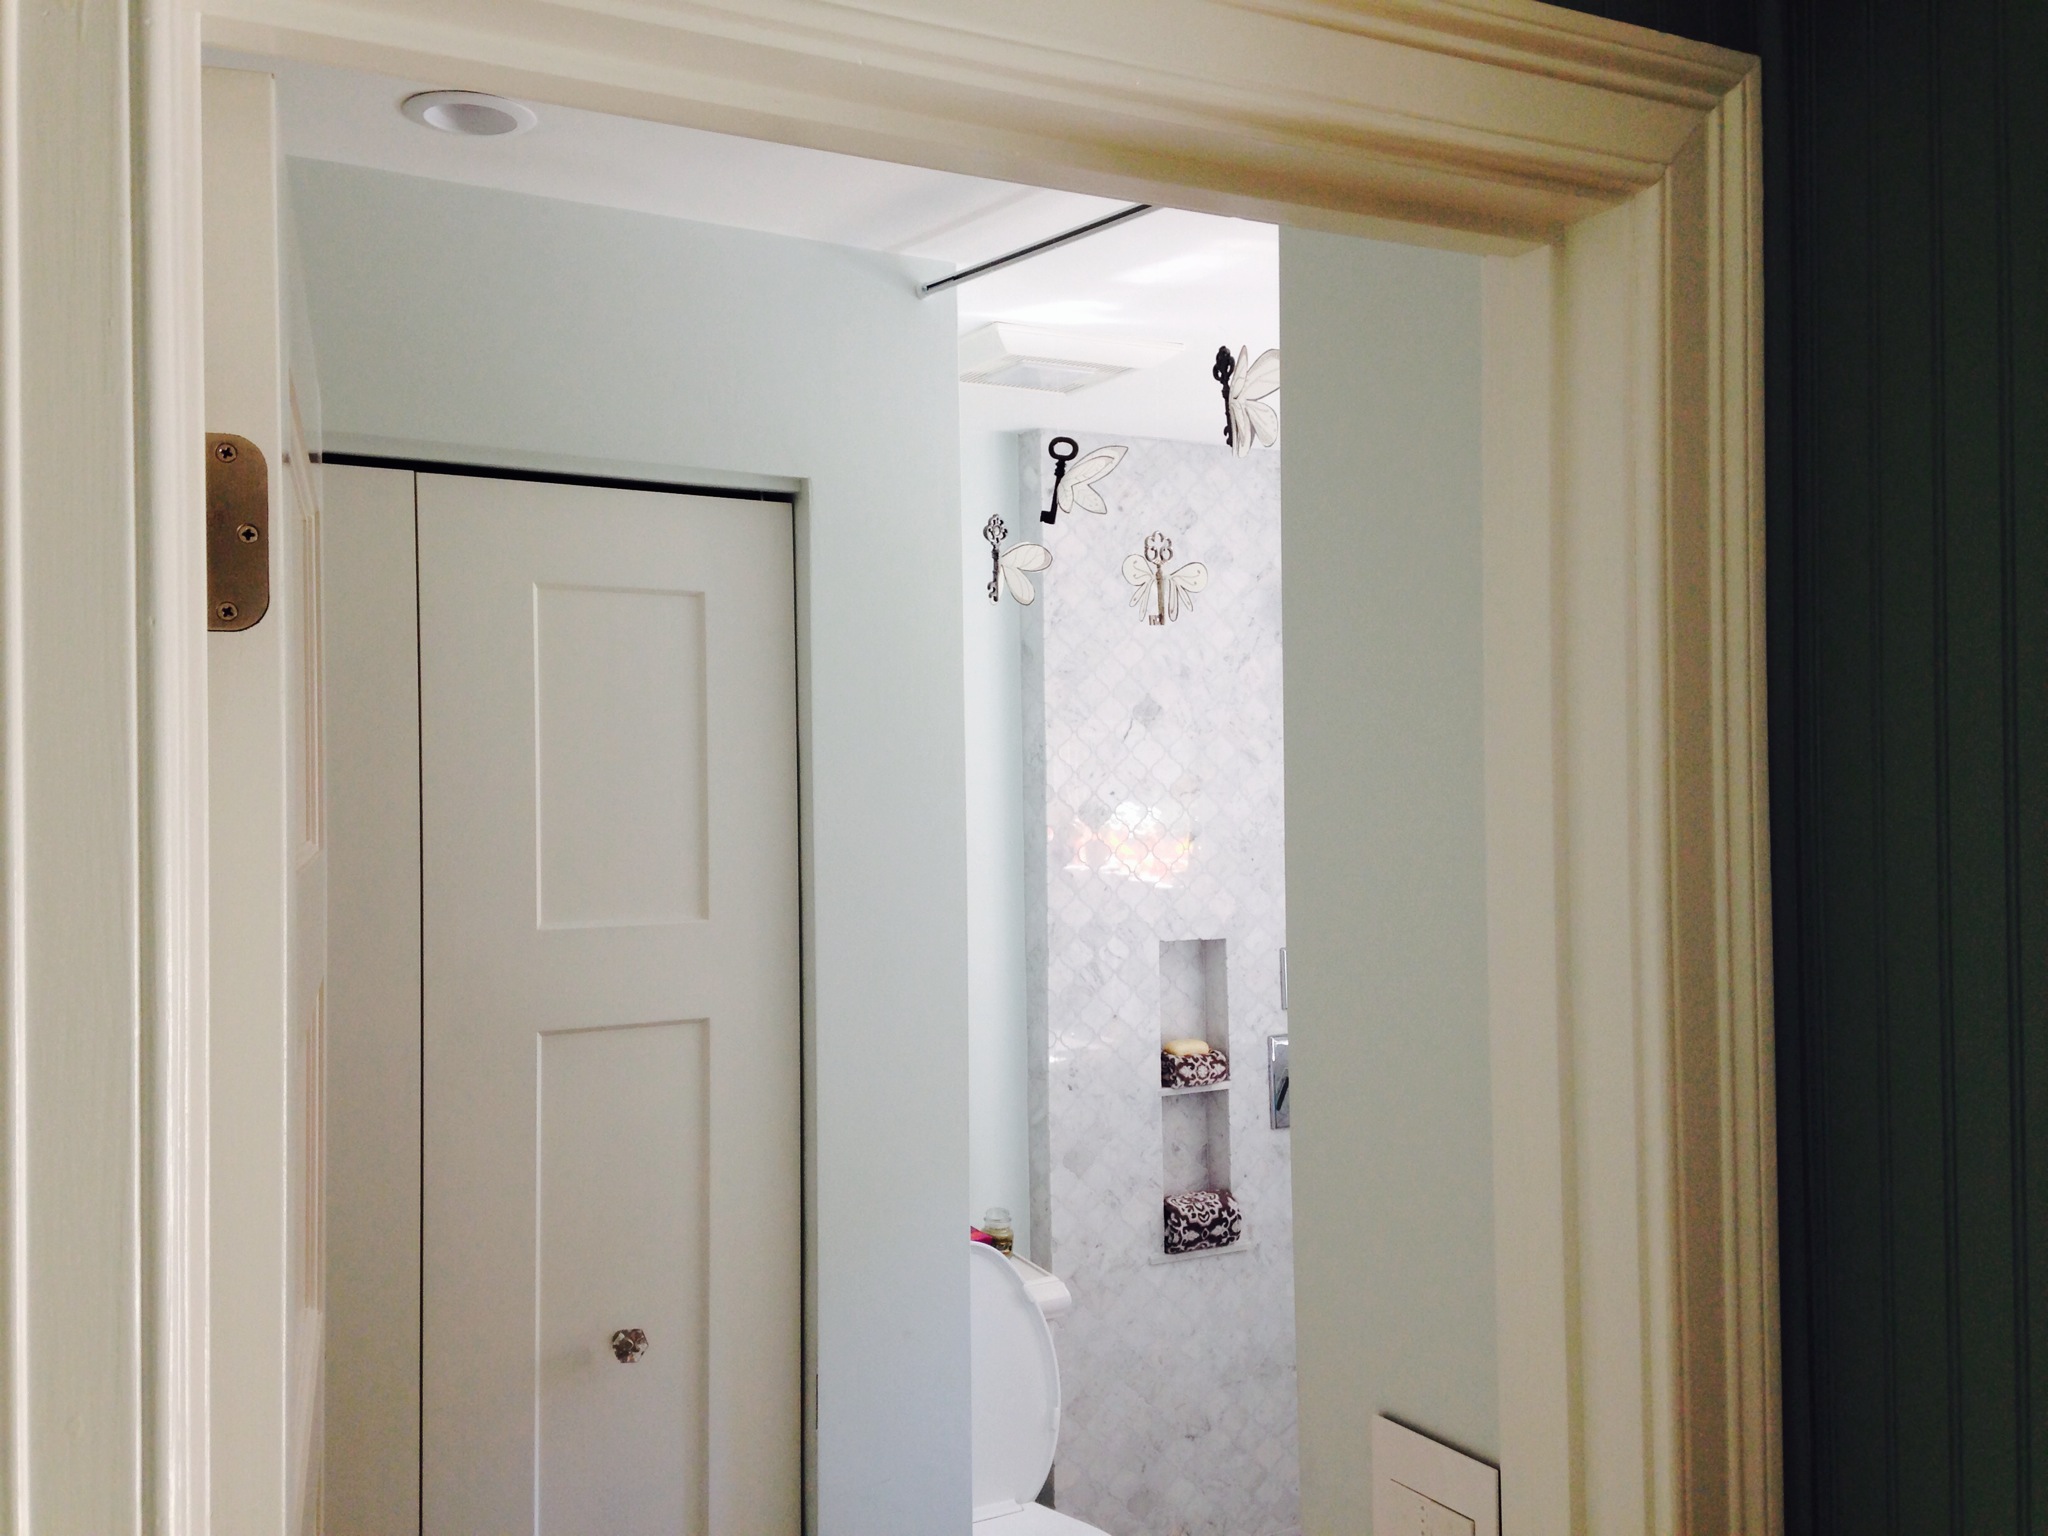
View of the project in place during party:
Strung them up with clear, stretchy jewelry thread. Then hung them from a tension rod that I placed between the closest two walls in the bathroom.CloserOpposite side viewView from living room as you enter the bathroom.


Where did you get the keys? How big were they?
They were about 2”-2.5” long, and I had purchased them then at Michael’s Crafts.