With my older sister due with possibly the last baby of the family, my mom and I thought it would be fun to make her a diaper cake as a surprise this Easter. We have never tried to assemble one before (and there are 5 grandchildren already here!). So, why not give it a shot!?
How to Assemble a Diaper Cake
What you’ll need:
1 box of newborn diapers – for bottom layer; for this project we purchased Pampers swaddlers
1 box of size 1 diapers – for part of middle layer and all of the top layer (not all will be used for this project- but keep an eye open for my other diaper project!)
A dozen or so of rubber bands
3 cardboard cake plates- 10”, 8” and 4”
Double-sided tape
–
Start with the bottom layer.
Fold each diaper in half, making sure the front/decorated part of the diaper is in the middle of the fold.
Wrap a rubber band around the folded diaper to stop it from unfolding. Continue folding, then bundle 6 folded diapers together. Then work on new bundle, etc.
The whole bottom will use 7 bundles for the outer circle of the bottom layer (42 diapers).

On the largest cardboard cake plate, assemble the outer circle of the bottom layer with the bundles. Following the circular shape of the cardboard.

Take the wide ribbon, shown here is a sheer white, and tie it around the circle. Not too tight, but not too loose. Just enough to keep the shape and hold the circle in place while you fill the center.
Continue folding diapers into bundles of 6, and place them inside the circle continuing the shape and filling the center.
Fold individual diapers and slide into places you see gaps.

At this point, the bottom layer is done. You can now slide your fingers under the ribbon to remove those rubber bands all around the outer circle.
Repeat with each of the smaller cake plates. Using the whole package of size 1 for the bottom and the outer circle of the middle. The newborn size will fill the center of the middle layer and make the whole top layer.

Secure the tiers together by adding double-sided tape to the cardboard plates and the diapers above and below. Stack the layers on top each other.

The cake construction is done!
…ONTO DECORATING!!
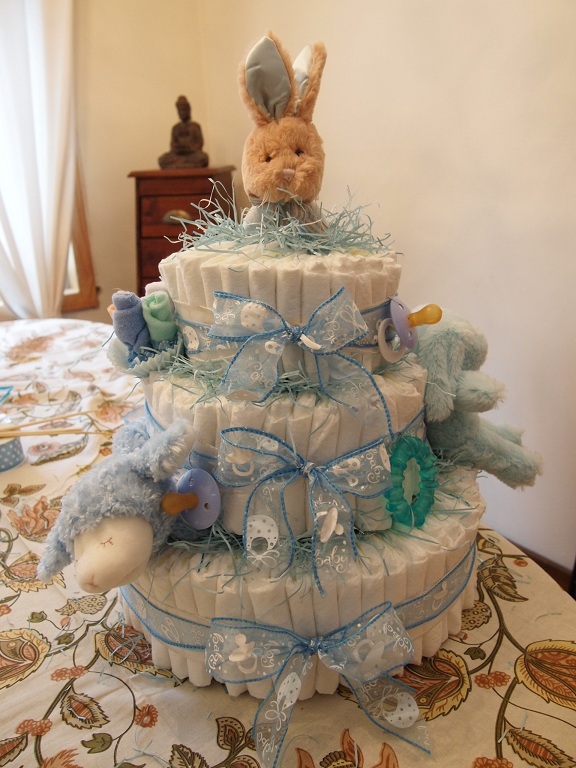
The design of the cake came from a gift that was sent from my oldest sister. She lives overseas in Sicily, as some of you know, and she sent a package to the family that had some gifts for the new baby. Well, she sent over a very handsome bunny rattle to add to this project, which we thought perfect as the topper..and thus the design of the cake was born.
For this project we used: 1 plush rattle, 2 plush stuffed animals, 3 teething rings, body wash, baby powder (that was put on after photos for some reason), a 2 pack of pacifiers, and a pack of baby sized face cloths made into roses. Then boy themed sheer ribbon and shredded tissue paper.
The bunny rattle was soft, and the head is on the loop where the baby holds it. So, we maneuvered the diapers around so we could stick the loop of the rattle inside a diaper securely. Then added shredded blue/metallic blue paper tissue in the center to hide the insertion point. Then between each layer we tucked in a handful of the tissue.


Then over the sheer white ribbon, we placed the boy themed ribbon and tied them into slightly oversized bows in the centers. It’s real important to make sure the sheer ribbon underneath is centered, secure and perfect before the top layer ribbon is put on. As you could see we tucked in the ribbon under the knots before tying on the blue ribbon.
Securing all the animals and trinkets was done by using a thing gauge wire, which you can find at your craft stores, and looping them around the item and then slipping it through the ribbon. Being careful to not wreck the ribbons effect of laying flat against the cake layers.


We made cute rose pops in a cup. Just by twirling a few baby-sized face cloths over a lollipop stick, securing them with ribbon, then poking a hole in cupcake liners and setting the sticks into the cake. Super easy and real sweet in person.
And done! A boy themed diaper cake!
To transport a cake of this size easily, you could cover it with two yards or more of thin tulle, cinching it at the top with a ribbon and giving as a present. Or as we did, wrap it in cellophane, taping it all around, then removing the plastic before presenting it. Keeping it secure under wraps makes it easy to maneuver.
**Keep an eye on my blog for the Diaper Wreath post. Another fun project/gift for when the baby arrives!
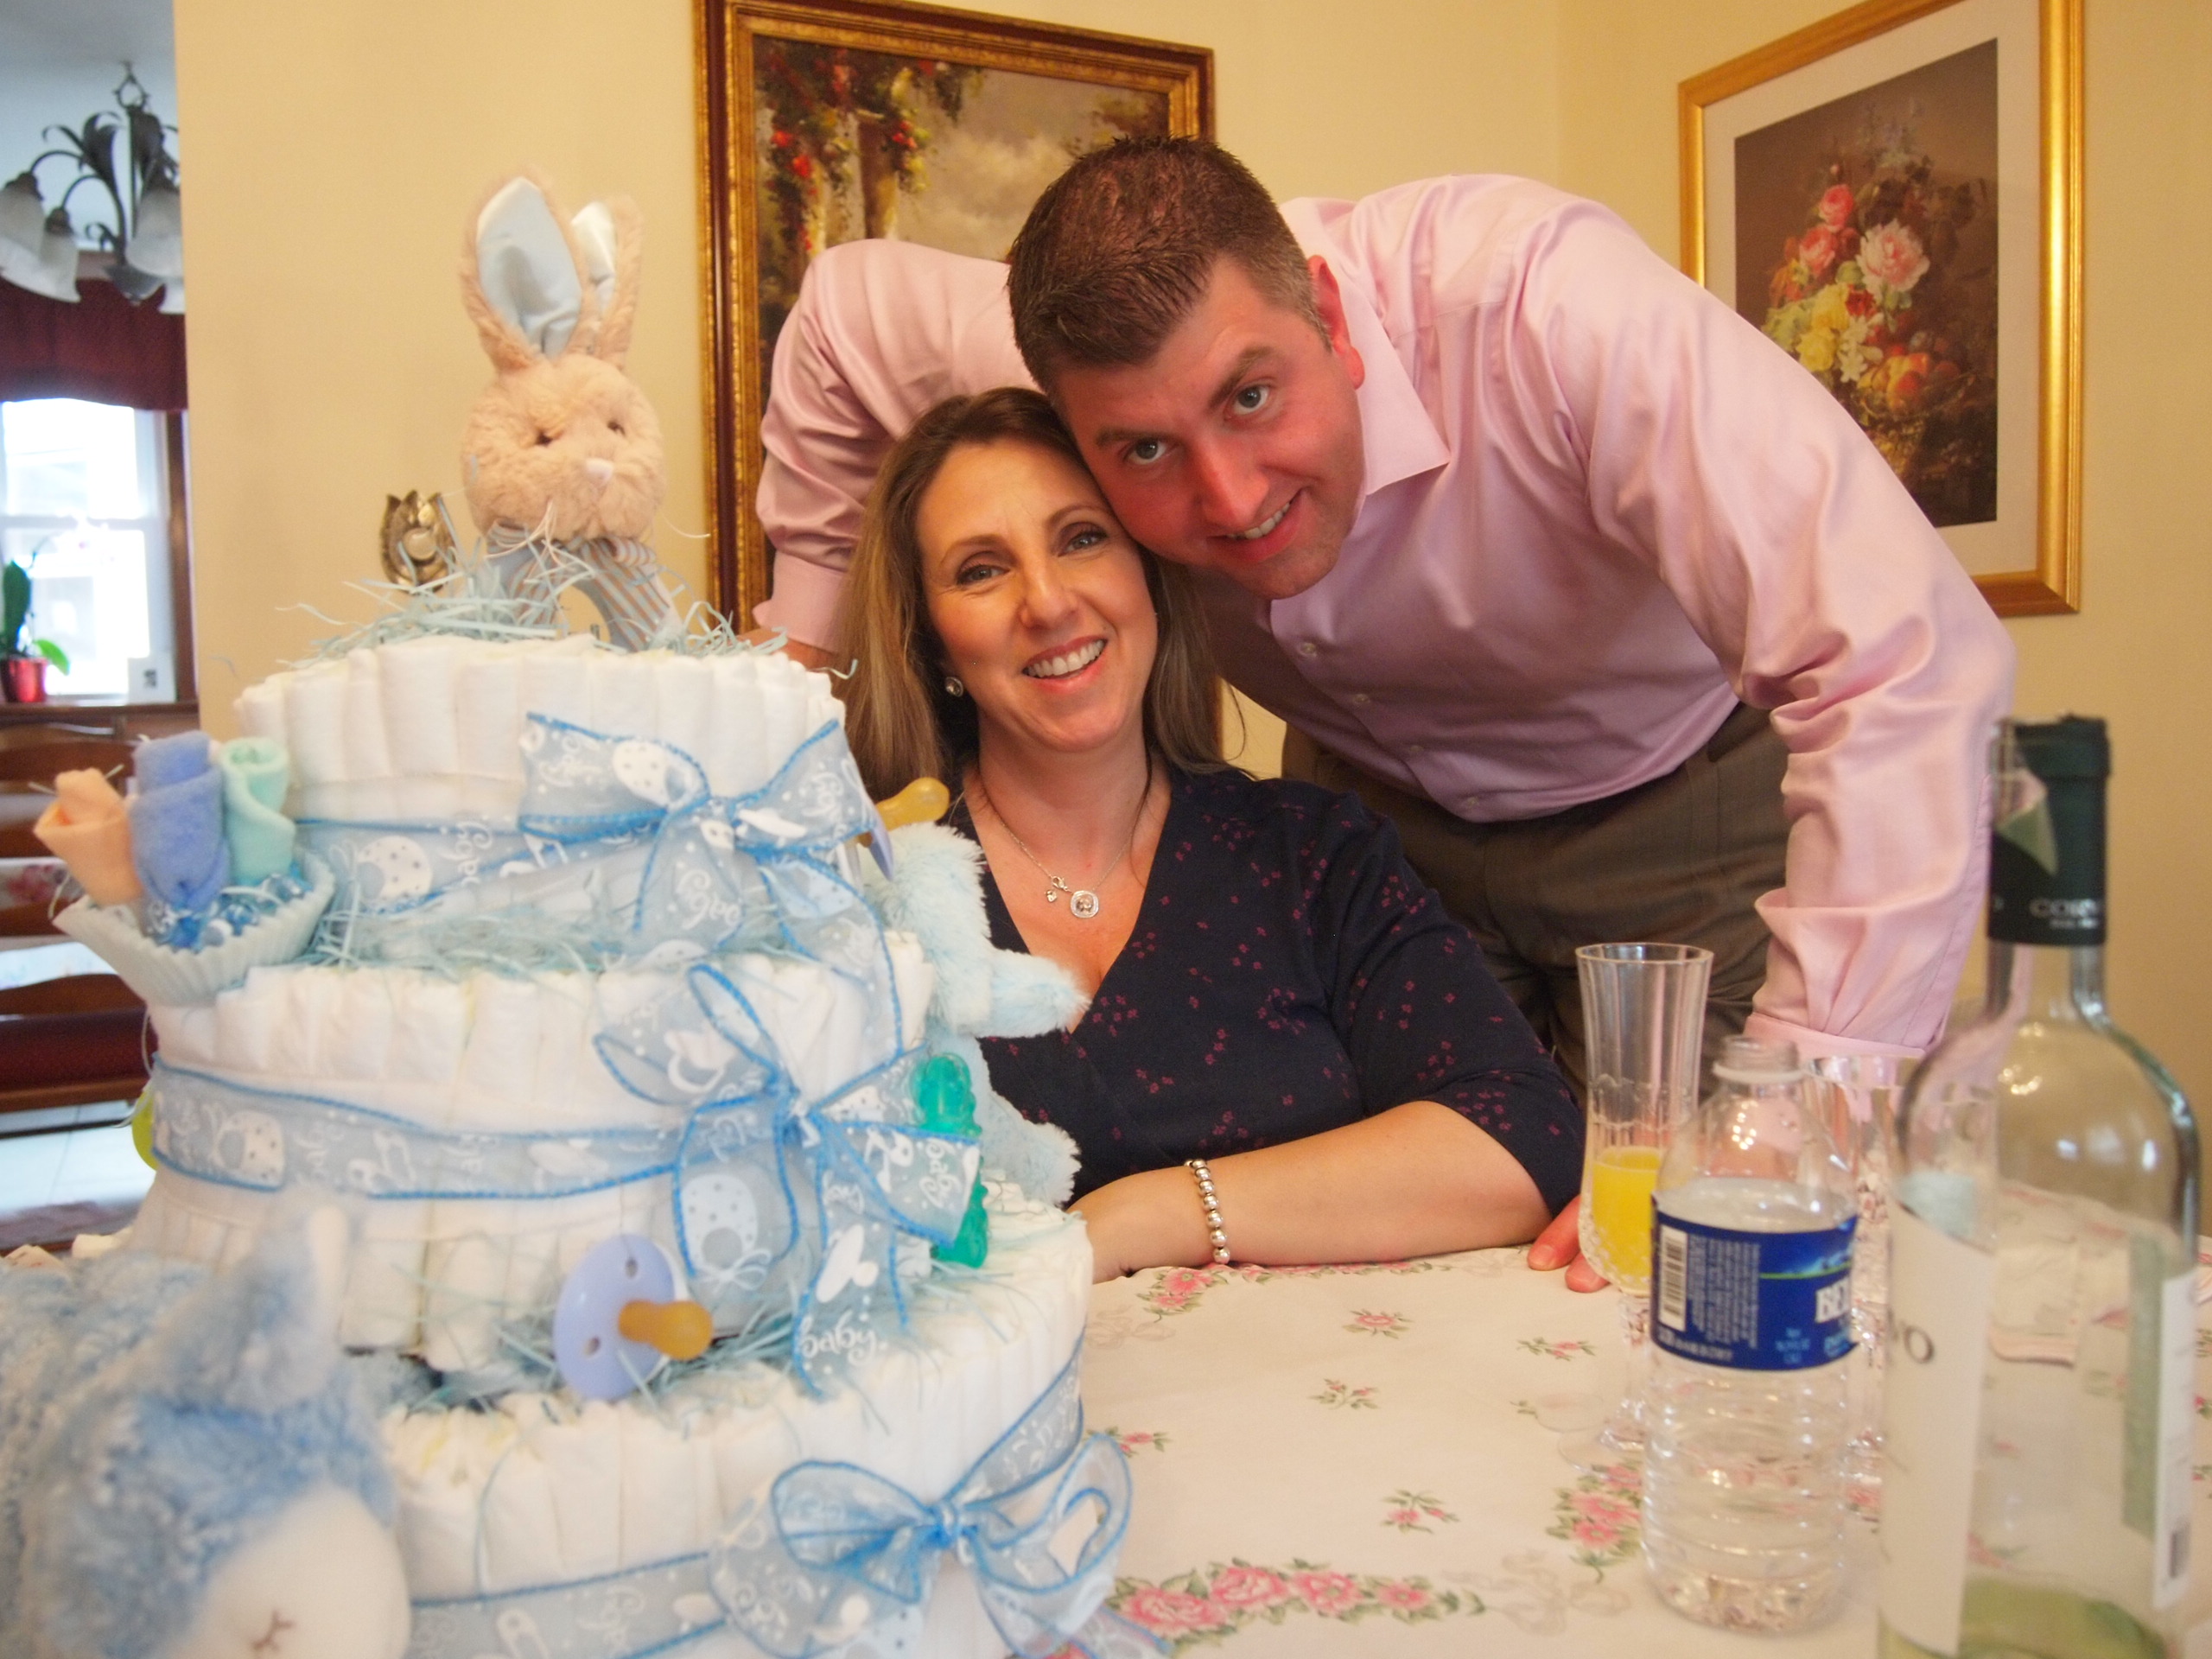
And here is the photo from the big reveal over Easter Sunday yesterday. It was a sweet gift!

your peter rabbit three tier diaper cake is beautiful. Nice job!
Thanks!